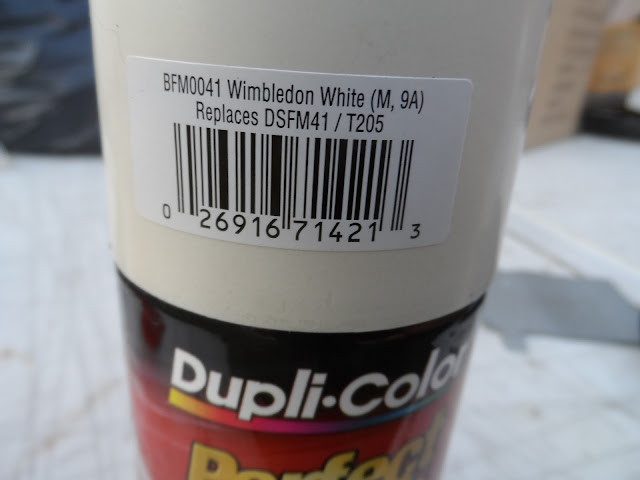
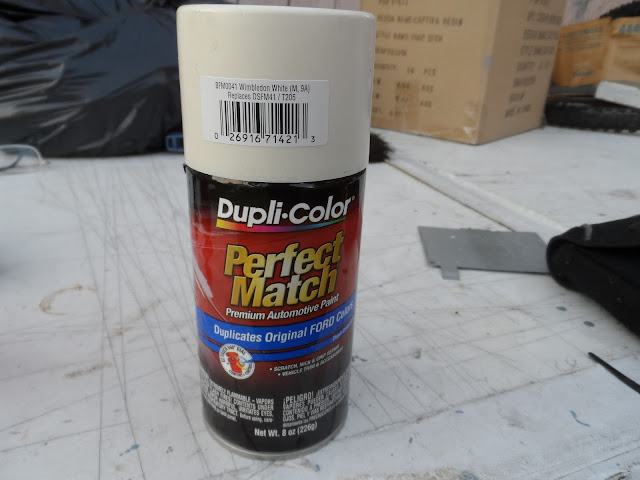
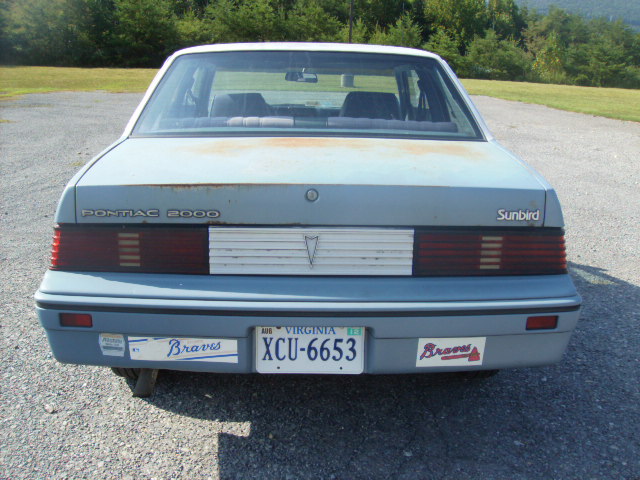
Well, I finally got around to starting work on the Coupe. Done dragged my feet long enough. Got my first gallon of custom mixed X-O Rust from the hardware store last year. Gallon of the stuff cost a paltry $33
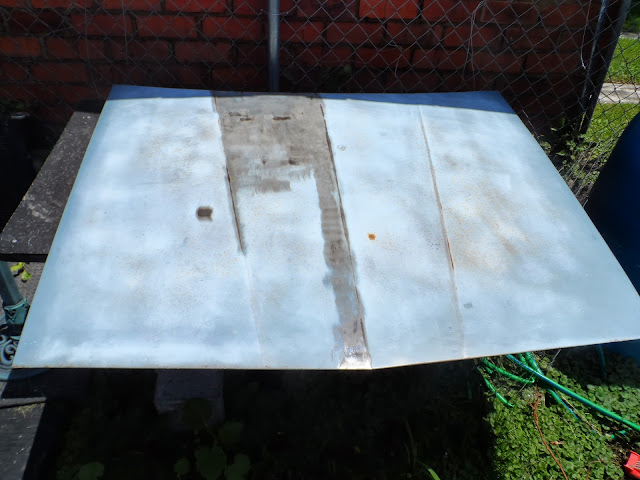
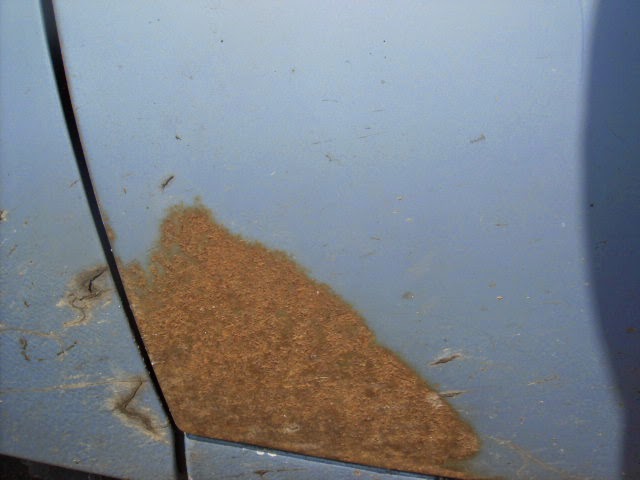
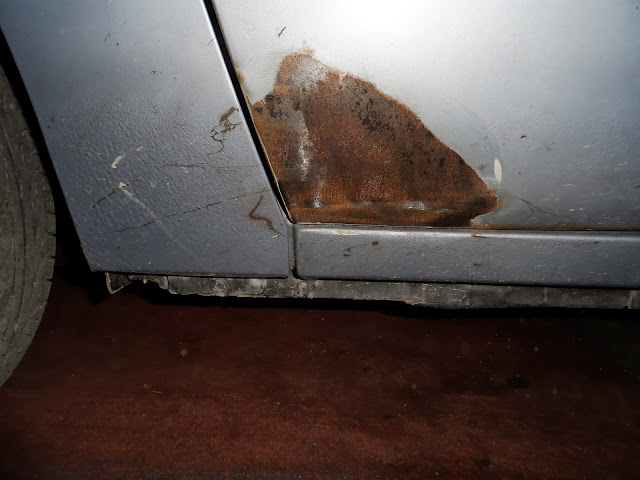
Trying to use all the lessons I've learned on this one. Upon taking off the primer on the top section I discovered it was terribly pitted and had been covered up with some Bondo to smooth out the top. At first it broke my heart to see the damage, but after finishing up with my wire wheel I saw that there at least wasn't any holes. After the first day I came to realize this was the perfect car for me after all, haa haa, at least I couldn't do much worse to it.
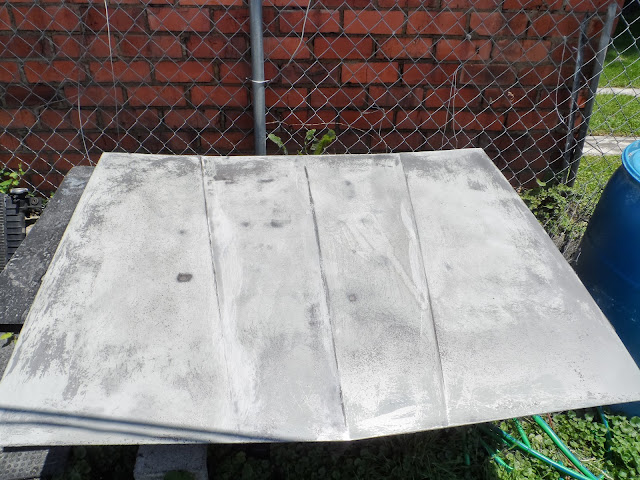
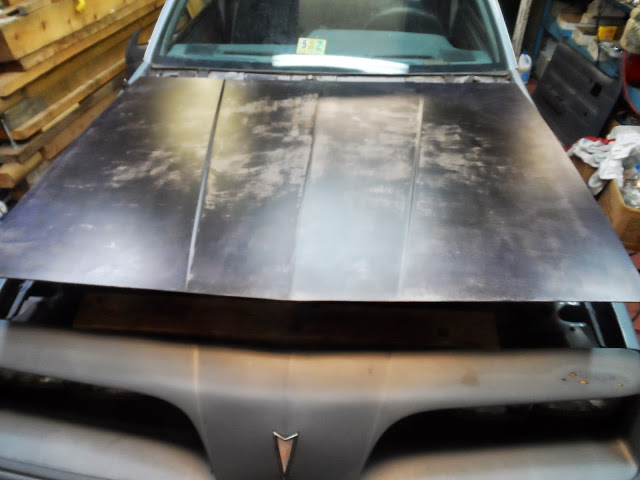
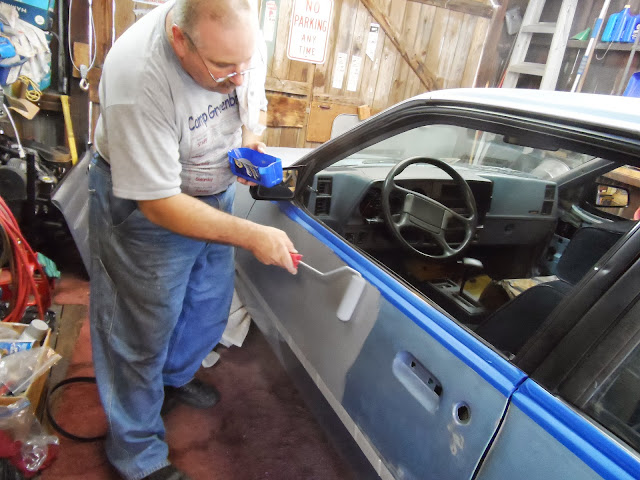
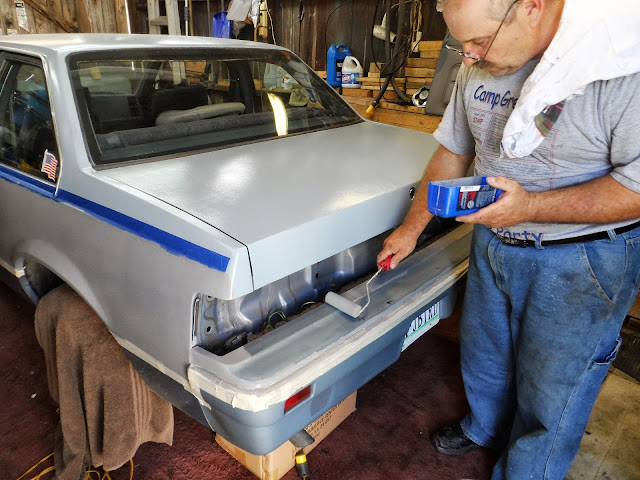
So here are a few befores and afters. I used the 4" foam rollers and laid down 2 coats of rust inhibitor all over the top and rusted areas. Followed with 2 coats of Primer , then 2 Color Coats. After the 1st Color Coat I took a small brush and tidied up any areas the rollers couldn't get to, then tied everything in with the second Roller application. Professional it ain't near to. Much better it definitely is. The Custom color mixed Gallon I got is very thick and lays down a very thick coat. I won't be worrying about rust issues around these areas for a mighty long time - that was the goal.
Went today and picked up my Custom Mixed Gallon of Dark Blue to 2 Tone the car with. Picked it up on sale at the hardware store today with a 25% Discount Coupon - so this Bucket of Paint only cost me $25 today. I'll take it to my local Napa and have them add some metal flake to it , mix it up, and pour it into 4 quart cans to make it easier to work with.Ran across a Quart of Dark Red that was a Return while I was there for just $3 that I'm planning on using to Stripe and trim a little with.
I'll have to get a couple of photos to show, but I found I can take a used quart oil container and cut it from bottom to top- just after the neck. This makes a perfect container to pour my paint in and use the 4" roller out of. When I'm finished, I just pour what is left back in the can and toss the oil container in the trash.
So my great investment here is about $60 for 2 gallons and 1 quart of paint, plus a few paint brushes and some 4" rollers. Beats the hell out of 4 Grand , and I don't have to worry about the clear coat drama ever again!!


.......................................................................


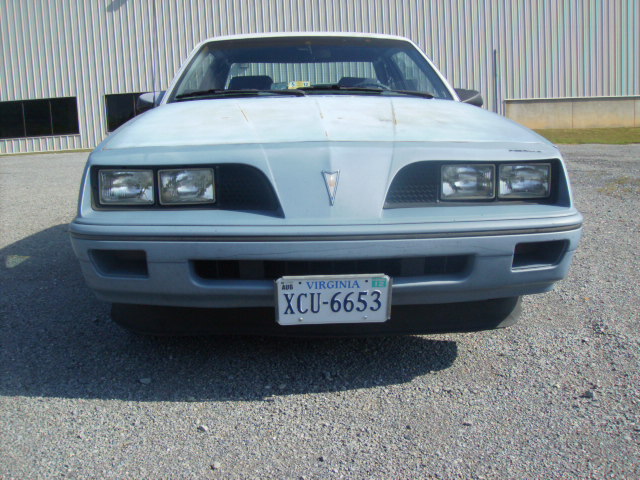
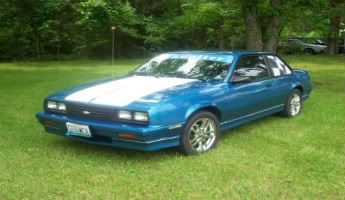
All kinds of J-Bodies on the Internet to use as inspiration - this one is mine.Here is a photo of the Paint Style I'm trying to copy. Of course this is top 'O the line Model and mine is just the Base Coupe.

.............................................................................
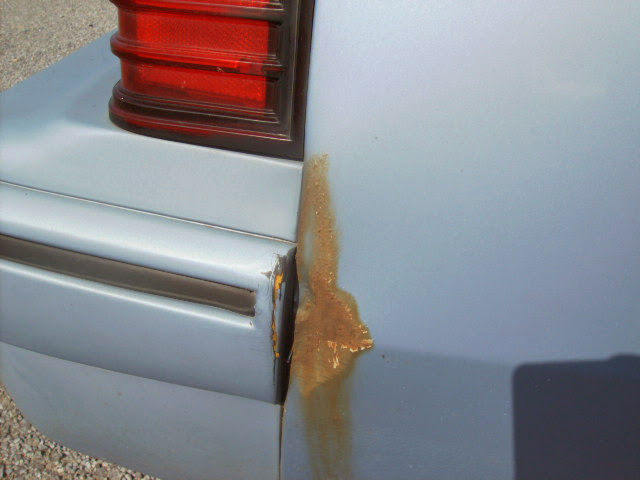
Looks good Orlen. I need to repaint mine soon as well. I found some cancer popping up behind the LH side skirt by the wheel opening. My clear coat has also been blowing off down the highway for the past year.
Looks good Orlen!!!
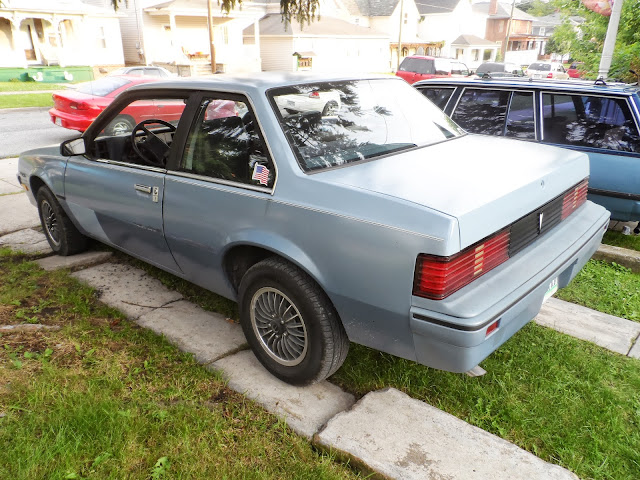
Bottom line is that it looks good going down the road and it's all one color. They call that a 20 footer and thats OK because it's keeping the rust gremlins away.


Well as long as your content with the end result.I know going body shop can cost lots of $ these days and the enviroment your in it will hold up for sure.Maybe you can get brave and buy a low cost spray gun and feel like maaco for the under 200 range.Nice results

The cheapo paint gun was an option at one time Ron. It was very hard for me to go this route. I too stand back at cars that have been taken care of this way and shake my head. For anyone that has done this - the first time I took a paint brush across the sheet metal was horrifying. If one can catch the paint before the rust sets in you've got a chance , or do a good sandblasting job and get every bit of it off.
Such is the rust gremlin in my particular case , though I am always working on something of mine. I tried the power packs at Napa and bought the Crossfire paint from them and went to work. Results were pretty good but within 18 months I had rust coming back and I found myself taking all that work back off and respraying again. On The top of Supercab of the Ranger I counted 42 rust spots alone. Spent a lot of time sanding and careful use of the Bondo to smooth out the top gave me a great looking finish.....for about 18 months.Then the rust came back out to play again.
So I needed a better option. I've got to trade off appearance unfortunately. Learning to get the best compromise out of it all. Having to constantly be taking areas down then the paint pops up or simply orange peels and rust starts - I need a procedure that doesn't take all day. I also need a Paint that is affordable and in large quantity to have plenty to use as needed. Working with brushes and rollers cuts down on all the masking every time I have to repair an area too. Using the rollers is a bit more expensive because unlike a brush these are a one shot item, but they paint a large area quickly and much better appearance too.
This is the first time I've been able to apply Rust Inhibitor across the whole top section - used a roller and got 2 really good coats to get started. Before I'd have to use a brush and put it where it was needed. Curiously the Rust Inhibitor is Water Based , but when applying with a brush it leaves terrible brush marks - looks a lot better with a roller. I did try the Rust Inhibitor in a spray can , but it always goes on like some kind of crazy Clearcoat , the bare metal areas do not turn black like the stuff in the bottle does.Will have to see how well this holds up for me. This car stays in the Garage the most so I'm thinking It'll be the best of the bunch and won't fade as bad too. Oh yea, the Cheapo Enamel Paint Fades a good bit too.
I'm on the wagon about every 8 weeks fixing a little something on the top. I get it when the trouble starts to show, and keep the rust away . Takes just a few hours and I'm done - instead of tying up the whole weekend every time. And I've been successful at keeping the body from rotting out so far.
Some folks have the best of both worlds and others are not so lucky. Some have Bodies that are Rust resistant and are in great driving condition. Others have little rust & paint issues but suffer a lot of mechanical & electrical woes. Mine fall into the category - I've got good running vehicles but have to deal with a lot of paint work. I consider myself lucky in that respect. There's an old saying " Chrome won't get you home".
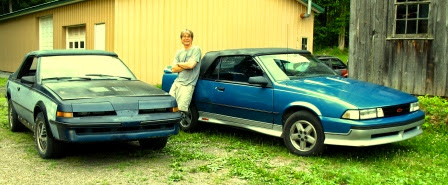
Like John said , they all are 20 footers, which might be a bit on the conservative side...LoL My 1st gens my not look showroom fresh, but I drive them daily and really do enjoy them. Hey, someone has to keep some a few of the hum-drum Wagons , Sedans and Base Coupes on the road - they may just wind up being a donor one day for one of those Z-24's
So as I go, I'm learning to do the best I can with materials that are easy to come by. I'd like to think I can share a thing or 2 here and perhaps give a wag somewhere a chance to keep his or her J on the Road. Rust and Body issues are a PIA, but they can be reasonable to cope with if you are willing to live with compromise. You don't have to send it off to the bone yard or shredder.
......................................................................
Great Post Orlen. It does take work to keep these guys on the road.

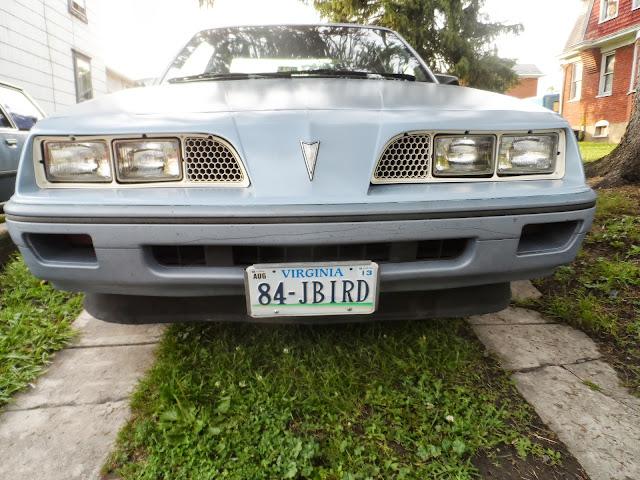
Wow thats cool that my old sunbird was your inspiration. I miss that car honestly!

2009 Ford Mustang V6
Wonderful Larry!! So glad to know the Sunbird I'm following from is remembered! The photo had been on my hard drive for a long time and I don't even remember where I copied it from. Makes it so much easier when you are thinking of 2 toning to have ones to look at and use for ideas. Looks like the car had a happy life from the photo!
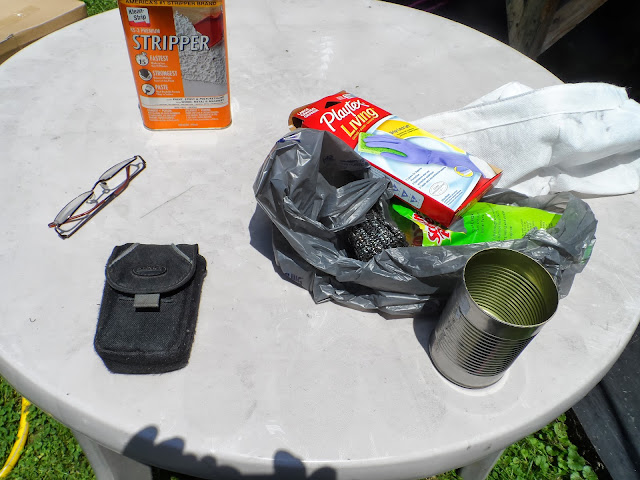
And now as promised......(or dreaded - LOL) here is my 0 cost solution to a container to use for painting with a 4" roller. Took awhile to come up with this cookie.
Save your left over 1 quart oil containers. I doubt the fancy ones Castrol and the like will work, but you can give it a try. They seem like they might be a bit too shallow. I grab these at work after they change the oil on the fork lifts and the work pick-up truck.
Simply pour the paint in the container , use.....pour left over back in can. It works wonderfully!!
Photos should be worth the thousand words.....


...........................................................................
Buys some dupicolor vinyl and fabric pain. Works great or SEMs.

On the inside my car looks like a fighter jet.
Seems you made some progress there.Good luck with the next steps.I am holding tight on my to do's just yet on sunny.I am making good headway on things like washing and waxing my civic,my mother in laws car and the wifes car thur and Friday.I still have to wash my house vinyl and then spray for bugs after the fact.At least I can keep my yard right and did trims some trees and bushes last wk so done there too.I figure in july I will start sunnys list when I can burn a vacation day and focus just on that and not interfear with my normal routine.Hood does look good orlen.
This low cost, DIY style of painting reminds me of the way a lot of people used to take care of their cars from the 20's, 30's & 40's. My family has drug home several old project cars that were brush painted. Why I even came across an article in a super old magazine I found in my turn of the century shed, which explained to the reader how to brush paint their car. I think the magazine was from the 30's called " The Country Gentlemen"
I like the wide multi stripe that separates the two colors on your reference photo. Sometimes pin stripping tape like that can be found cheap at swap meets and on ebay, but it seems like you really have to step up to buy it when going to the autoparts store. A 1 /2" - 3/4" wide engine turned stripe with a smaller colored stripe stuck on top to make a 3 stripe color separator would really give the car some "pop & flash" Oh....I just remembered you have red paint for accent.
I am excited to see the finished product and how you use the red paint for accent.
Here is a Site I was studying before I took the plunge. Wonderful stuff here , but I'm afraid I'm not enough a perfectionist nor patient enough to roll on 10 or more coats + a whole lotta wet sanding. The X-O Rust can be custom mixed too, unlike the Rustoleum.
http://www.rickwrench.com/index79master.htm?http://www.rickwrench.com/50dollarpaint.html
My goal was really to get some thick coverage. I had sprayed on the Crossfire Paint from NAPA, and it is good if you don't have rust issues to begin with. I just got tired of having to clean off a large area and mask up practically the whole car over and over again everytime rust decided to ruin my day.
While I was painting this weekend, I literally grabbed the roller out of the trash ( it was laying amongst some hand fulls of masking tape I'd taken off. and popped it back on and touched up a couple of small scratches on the rear quarter I had finished a month ago. The paint covered them up quickly and blended in so well I can't even tell where they were now!
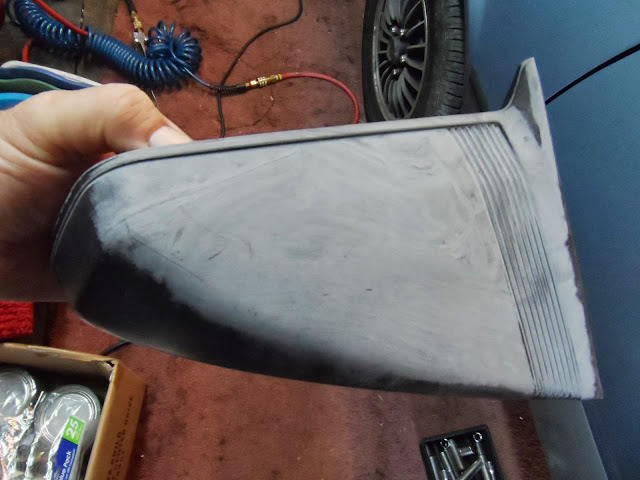
Got the rotted out Window Sweeps back on this evening when I got home, along with the repainted Side View Mirrors. Just learned I can remove that Shroud over the Windshield wiper linkage with the hood shut - Haa haa the journey continues!!
........................................................................
Well I see you did your homework Orlen. That guy got pretty good looking results from what the camera was showing us. I liked his 63 Falcon woody wagon sitting in the back ground.
I can easily believe he put 8-10 coats of paint on and would have to have wet sanded the day lights out of the car to get out the texture, but that's what I do since I don't spray base/clear coat very often. so your not up to the challenge of 10 coats of paint, then how many are you going with? Any plans to wet sand and buff on the shine afterward? Even though I dislike that part because of the all the time and effort, there is something to be said for how rewarding a smooth shiny paint job becomes afterward. Its really awesome when your rag just wants to slide off the car because it is so smooth and slick.
Keep the picts coming because I am need the motivation and inspiration.
Get a cheap harbor freight DA sander and have someone spray the car with a hose when you sand. Ghetto way to wet sand. I saw someone do this before because they were to lazy to it by hand.
On the inside my car looks like a fighter jet.
Hey Rob you just might be onto something!! Maybe I can mix the sand and water together and have the Fire department spray it all on the car for me!!

Bill, I go with 2 primer coats and 2 color. Since I don't thin the paint down before hand it is darn thick - and good coverage. I really lay it on extra heavy on the wagon since it is out in the elements 24-7 and I have tons of orange peel on the top surfaces , but since it tends to need attention every few months somewhere I am satisfied with that. I can take it down and repaint in a few hours and go on. I plan on sanding down the wagon if things settle down a bit on it and rolling the top surfaces on it too.
I am a Janitor by trade and have learned there are just so many coats of sealer and wax you can lay on the floor before it starts to look horrible. Same goes for the paint too - I have found that sweet spot on the Pontiac now just how thick I can roll on this stuff before it starts to orange peel up on me.
Will be getting with you soon regarding the Quarter Windows and related.

.........................................................
You could always buy a 3 gallons of plastidip for $300 and dip the whole car and not have to worry about prepping, tapping, or anything. Just clean the car and spray. Sanding helps to. The price includes the spray gun and everything. I am going to atte.mpt to do my one car with it since everyone keeps asking me to do it. It's the new hotness right now even though I am not a fan of it.
On the inside my car looks like a fighter jet.
I'm just trying to learn alternatives to the spray gun method. Here in Virginia they have been threatening to regulate Auto Spray Painting. You won't be allowed to buy Automotive Paint and Reducers without a permit which you can't have without an EPA Approved Spray Booth. Of course there are always people everywhere with Cell Phones now and could easily snap a photo of you were to violating such a regulation. Whether they eventually do or don't...I don't want to worry about being dependent on the spray gun and a Government that can tip the boat over in a moment of their political correctness.....
.......................................................................
I too have heard about regulations limiting the DIY from spray painting a car at home, but I wonder if that will effect the new water based paints that have been out and becoming accepted by body shops? My tried water based paint on a family friends t-bucket he painted last summer black in color. Dad said he liked the paint and was surprised how quickly it dried and was just as easy to use as the base color in a base coat / clear coat system. If limiting regulations are coming, then I wonder if it will effect home owners from spraying latex paint on their homes etc, if not, then I am ready to raise a fuss and cry discrimination because that's a bunch of crap requiring DIY guys to pay spend more and get less.
Been enjoying the rolling.....So I've been "Rolling On!! "
Welcome to the Country Bumpkin Paint Shop.......


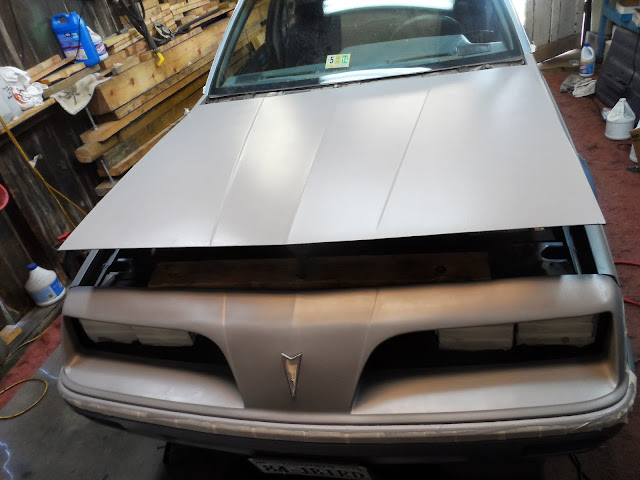
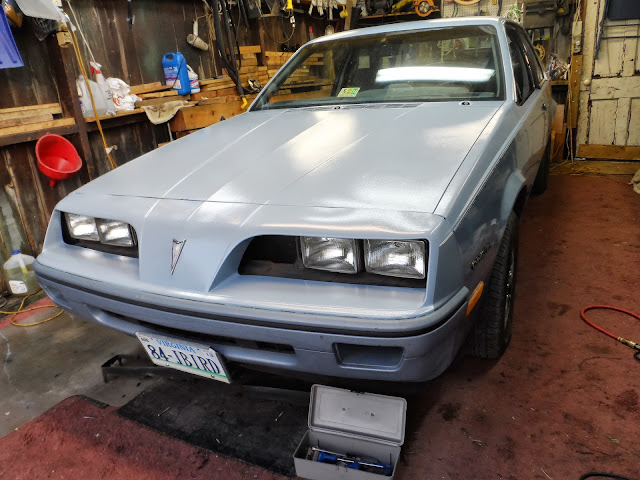
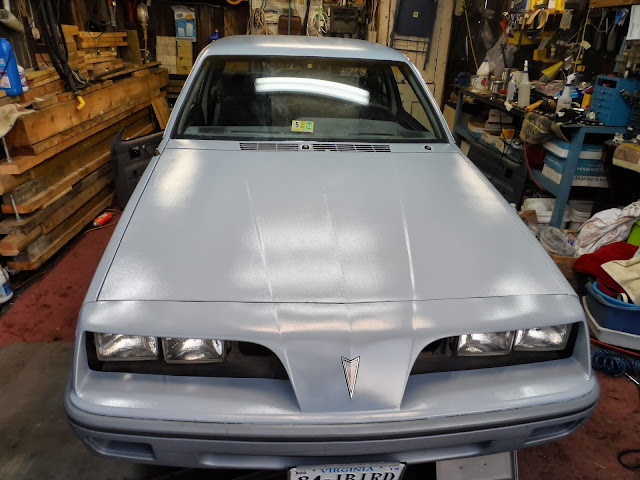
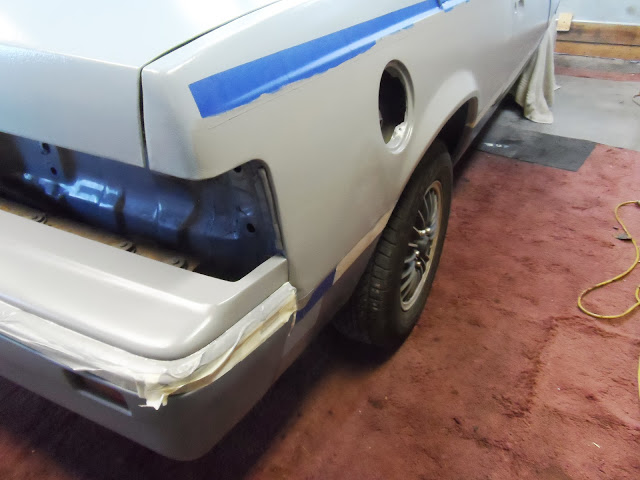
Decided to go ahead and paint down to lower beltline. I got a 5 day break coming up next week and hope to get the lower two tone rolled on then. So I'll get this mid section painted this weekend and allow some drying time and bolt the hardware back together next week. The whole car is blending in nicely since the whole body is having the same texture. This method produces no paint runs too - which is a plus.
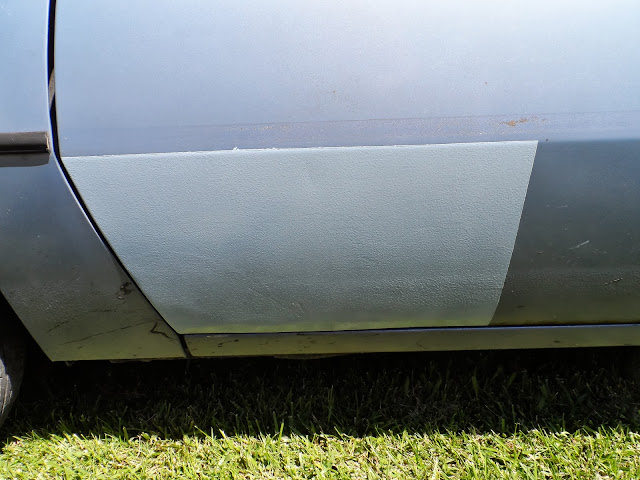
Primer done on sides now :
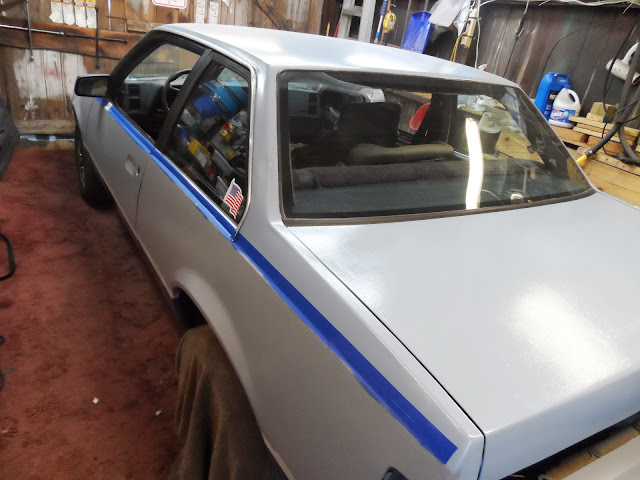
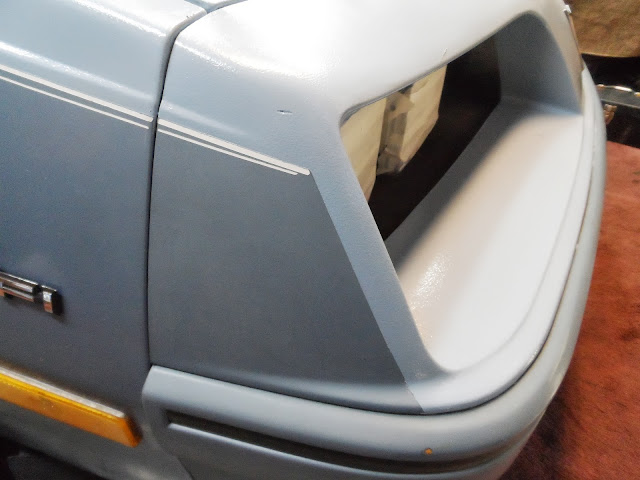
Going this route scrapped the small line angled to the bumper I originally had - most painting this would have been a nightmare to change out, but a small feathering and it blends right back in!!
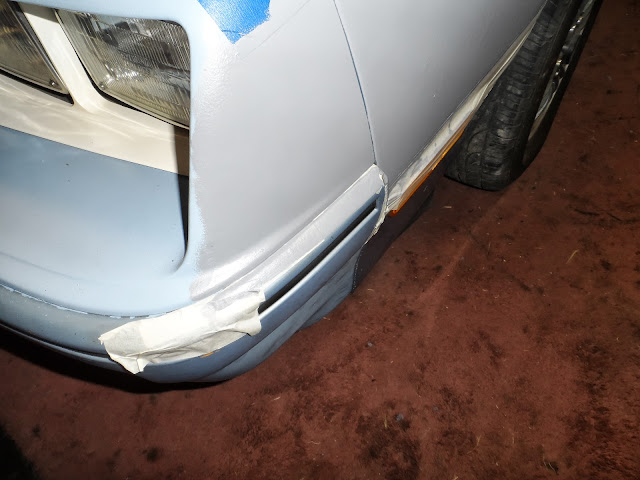
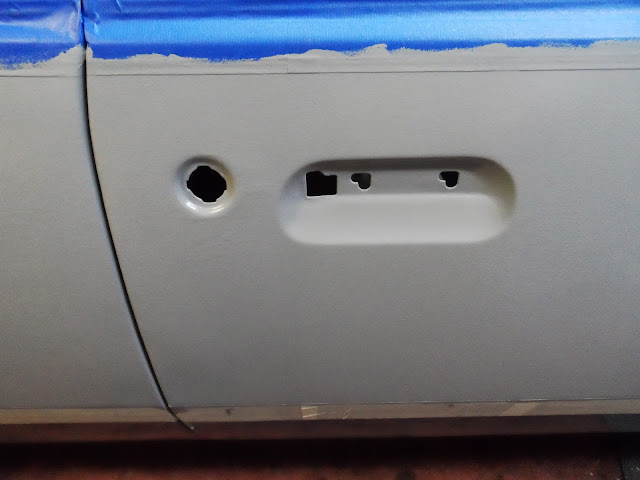
Had to take the tail lights and center piece back out....Darn it!! LoL The Gas Filler Door has proved to be a heck of a piece to get painted up.
The hardware was incredibly easy to remove - I taped all that up when I Rattle Canned the Wagon. Next time I'll pop the door panels off!! Hoping that I got the lower beltline taped off correctly...... Guess I'll find out after the 2 color coats are applied tomorrow!!
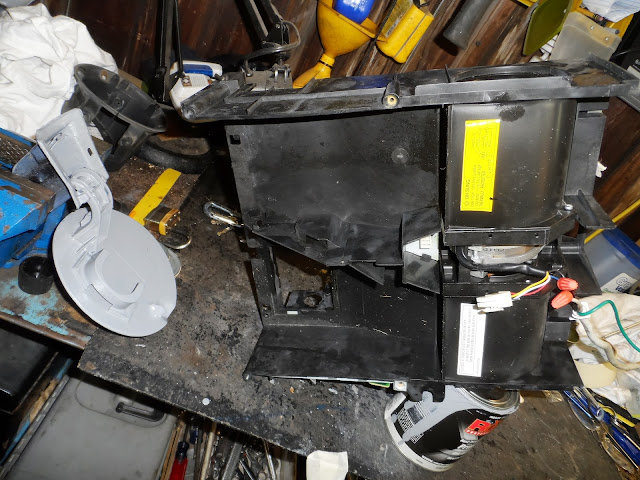
Hey this really is Country Bumpkin Painting.....Here I am using a blower unit out of a dead Microwave to blow air over that hard to paint Gas Door!! China hasn't taken over our Hillbilly Ingenuity....Not Just Yet! Hmmmm...wait a minute. I just Bet that Microwave came from China! How Ironic....
.......................................................................