alright, so i got this idea from the guy who did this same thing, only he put gauges in his, and i'm putting switches in mine (sorry, i don't remember his name!)
anyways here's what i did step-by-step, and it's so far the first thing i've made that's turned out incredibly smooth...
here she is so far...
i laid down 2 sheets of fiberglass cloth. then i loaded the beast up with resin, let it dry, sanded it a little, and here's what i got...

next i threw some body filler on...

then of course next comes more sanding...

then came the filler putty. this worked wonders to fill in the little "dips" that the filler sometimes leaves behind...

more sanding... who would've known?

then it came time for some cleaning...

that's how she sits now. i had to run to radioshack to pick up some switches, and then it was time for work. hopefully i'll be able to finish this within a day or two. so far this project has only taken me about 1 hour total, minus the waiting around for the resin to dry. anyways i hope you like it so far... comments/suggestions are more than welcome!
~Cole
yes i do have a dip... i kind of like it that way, i think it gives it a little more umph! lol.
What is that piece? A change holder or something?
<img src=http://www.consumptionjunction.com/i/default03.gif>
alright... so here's some updates.
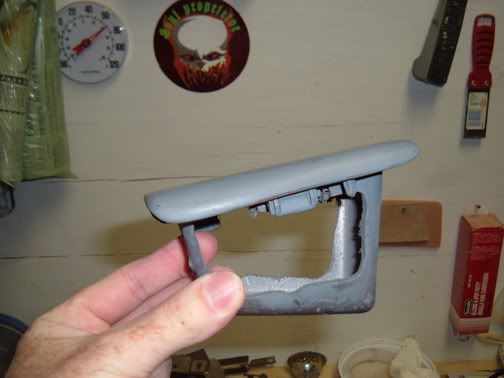
i had to saw off the bottom in order to make room for the switches along with their wires...

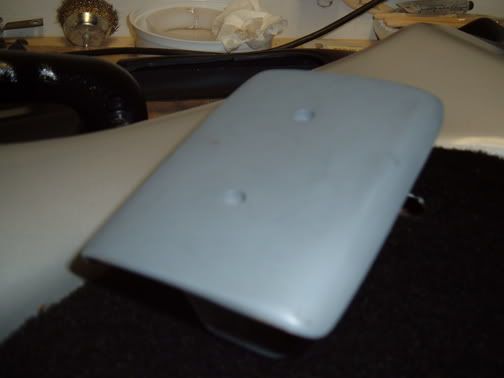
then i needed to drill some holes for the actual switch part (the holes look like different sizes, they aren't though, maybe it was the angle of the camera or something...)

then came test-fitting time... they fit perfectly!\

then it was time for primer...

alright, that's where it stands today. i did have a quick question. i have one or two tiny spots where this isn't 100% smooth. should i wet-sand it down (just get like 180 grit wet and sand, right?)? anyways i hope you like it so far. this is the only project that's actually turning out so far, haha! any comment/suggestions are more than welcome
~Cole
Quote:
What is that piece? A change holder or something?
yes, it's the one of the change holders for my 2001 sunfire. since i'm not a smoker i've always just kept all of my change in there... haha. anyways yeahhhh...
~Cole
i think its turning out rather well. i think its kinda funny cause i have my piece fiberglassed as well for my gain controls for my kicker amps. its sitting in primer waiting for paint as well.
as for wetsanding it, i'd use a bit of glazing putty, or if they are really small. just use some high build primer, give it a couple coats, then wetsand it with 400 grit.

 http://www.flickr.com/photos/sndsgood/ https://www.facebook.com/#!/Square1Photography
I like the idea a lot and you did a GREAT job, but I did mine this way just so the switches are recessed and impossible to hit on accident. Especially since they deal with nitrous

I made the plate out of aluminum and polished it to "chrome."
<img src="http://www.hostdub.com/albums/corradofreek_album09/Switches.sized.jpg">

thanks all of you...
Quote:
i think its turning out rather well. i think its kinda funny cause i have my piece fiberglassed as well for my gain controls for my kicker amps. its sitting in primer waiting for paint as well.
wow, number one what are the chances? and number two yours is looking really good!
Quote:
I did mine this way just so the switches are recessed and impossible to hit on accident.
wow, never really though about that before... that is a really good idea. if i don't like the finished piece though i'm just going to get a stock piece from the junkyard again and probably toss this project. it was more of a "practice/experience" thing, just to get the hang of it. ah well... thanks for commenting!
hopefully, weather permitting, i can throw 2 more coats of primer on, then maybe wetsand, then paint the beast silver, and throw on a clear coat. thanks again!
~Cole
quick question... my interior by the time it's finished it going to be dark grey and metallic silver. to add a little contrast, should the little "screw" things or the little hexangonal pieces that go around the switch to make it tight be painted dark grey? it was just an idea that hit me, any suggestions are most welcome...
~Cole
just a few pics to update this... tell me what you think so far... obviously i still need to paint/clear coat it...


looks good so far man but i think you got the idea from me

j/k i dont know who did it first but mine looks sharp as well.... post pics soon for all to see!

here's the final product. i happened to chip the left side of it while screwing on the switches... dangit! lol. it's all good though. i'm really happy with how this turned out, it was my first success! lol. hopefully i'll be doing more stuff soon!


so it has it's flaws... i'm still in love with it... lol. but i think overall it turned out great, considering my skill level...
~Cole
I like my power window switch...

oh well,

looks good man...where abouts did you get those switchs, that say on/off on them
i got 3 pack of switches (only used 2, obviously) from radio shack for $5... not bad?
It looks great, don't get me wrong, but there is one somewhat significant issue. Fiberglass does not bond to plastic. I don't know if it will be ok with just a switch panel, but I know that when I made custom door panels, the fiberglass pulls away from the plastic when it expands and contracts from temperature changes and vibrations. When you are attempting to bond fiberglass to plastic, you should drill some holes and glass the back, too, so that the fiberglass is bonding to fiberglass in a "sandwich" rather than directly to the plastic. I am sure yours will hold up because there is minimal vibrations in hte center console, though.

sorry but how do u do this with a 95 cavy?


