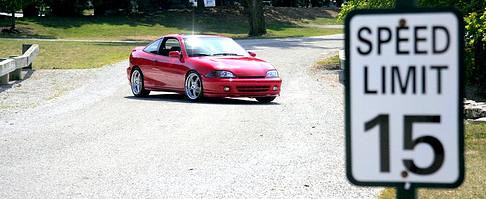
Well first off you need to fill out a profile. Cause no one can really help you unless you fill it out. This also needs to be in exterior forum instead of General. For you to swap over the bumper you don't need anything at all. I'm going to post up the stuff from Dealerworld for you. If you don't understand what it is sayin' then maybe you should let someone help you from the org, but really it is easy as hell.

I can e-mail with the drawings, but I don't like to really give it out. These are for the front
Front Bumper Fascia Replacement (Chevrolet)
Removal Procedure
1. Remove the right splash shield, forward of the front wheel. Refer to Splash Shield Replacement - Wheelhouse in Body Front End.
2. Remove the left splash shield, forward of the front wheel. Refer to Splash Shield Replacement - Wheelhouse in Body Front End.
Object Number: 284848 Size: SH
Click here for detailed picture of above image.
3. Remove the bolts (1) that retain the fender to the fascia (2).
Object Number: 284846 Size: SH
Click here for detailed picture of above image.
4. Remove the retainers from the top of the fascia (1).
5. Remove the fascia (1) from the impact bar (3).
6. Disconnect the following connectors:
• The park lamps
• The turn lamps
Installation Procedure
1. Connect the following connectors:
• The park lamps
• The turn lamps
Object Number: 284846 Size: SH
Click here for detailed picture of above image.
2. Install the fascia (1) to the impact bar (3).
3. Install the retainers to the top of the fascia (1).
Object Number: 284848 Size: SH
Click here for detailed picture of above image.
Notice: Use the correct fastener in the correct location. Replacement fasteners must be the correct part number for that application. Fasteners requiring replacement or fasteners requiring the use of thread locking compound or sealant are identified in the service procedure. Do not use paints, lubricants, or corrosion inhibitors on fasteners or fastener joint surfaces unless specified. These coatings affect fastener torque and joint clamping force and may damage the fastener. Use the correct tightening sequence and specifications when installing fasteners in order to avoid damage to parts and systems.
4. Install the bolts (1) to the following components:
• The fender
• The fascia (2)
Tighten
Tighten the bolts to 10 N·m (89 lb in).
5. Install the left splash shield forward of the front wheel. Refer to Splash Shield Replacement - Wheelhouse in Body Front End.
6. Install the right splash shield forward of the front wheel. Refer to Splash Shield Replacement - Wheelhouse in Body Front End.
Rear end....
Removal Procedure
Object Number: 284868 Size: SH
Click here for detailed picture of above image.
1. Remove the upper storage net retainers (3) inside the compartment in order to access to the fascia screws.
Object Number: 284862 Size: SH
Click here for detailed picture of above image.
2. Remove the screws (3) from the inside of the rear compartment.
3. Remove the screws (2) from the rear fascia.
The screws are located in the rear wheel housing.
Object Number: 284866 Size: SH
Click here for detailed picture of above image.
4. Remove the push in retainers (2) from the lower fascia (1).
Object Number: 284860 Size: MH
Click here for detailed picture of above image.
5. Remove the rear fascia (1) from the impact bar.
Installation Procedure
Object Number: 284860 Size: MH
Click here for detailed picture of above image.
1. Install the rear fascia (1) to the impact bar.
Object Number: 284866 Size: SH
Click here for detailed picture of above image.
2. Install the push in retainers (2) to the lower fascia (1).
Object Number: 284862 Size: SH
Click here for detailed picture of above image.
Notice: Use the correct fastener in the correct location. Replacement fasteners must be the correct part number for that application. Fasteners requiring replacement or fasteners requiring the use of thread locking compound or sealant are identified in the service procedure. Do not use paints, lubricants, or corrosion inhibitors on fasteners or fastener joint surfaces unless specified. These coatings affect fastener torque and joint clamping force and may damage the fastener. Use the correct tightening sequence and specifications when installing fasteners in order to avoid damage to parts and systems.
3. Install the screws (2) to the rear fascia.
The screws are located in the rear wheel housing.
Tighten
Tighten the nuts to 9 N·m (80 lb in).
4. Install the screws (3) to the rear compartment.
Object Number: 284868 Size: SH
Click here for detailed picture of above image.
5. Install the upper storage net retainers (3) to the inside rear compartment.
As for the sides you are just going to have to use like self taping srews on them to hold them up by the pinch weld. As for the clips that might be a PITA cause if you car didn't ever have them you will not have the holes for them. Do the rear and front for now, and maybe someone can help you out.


