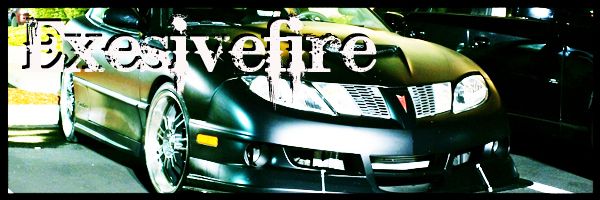
Hey all..... I'm planning to install the gm s/c on my 2002 with the ecotec engine this wednesday. Now, I've got some very mechanically inclined people to help me with this. These guys have done probably 5+ s/c installs on 2.4's in the past, but none on an ecotec. The ecotec charger install has been said to be a trickier install than the 2.4, however I bought the entire install kit from paceparts with the injectors, heat exchager etc.... basically EVERYTHING.
So here's my question, how hard of an install is this if you've got everything there to do it? Is it gonna be one of those installs that perplexes people til 3am and then can't get it done til the following day? We're lookin to get this started this Wednesday (after work) so I can have it all done and reflashed before on the following Saturday.
Any opinions? Or help getting by possible tricky spots? Or tips for the overall s/c eco install?
Thanks everyone

not to bad,i done it myself with no experience at it in six hours,something tricky is getting the belt on,gm didn't put a locking system on the belt tensioner, and some of the pictures aren't that great,i feel you shouldn't have any worries just becareful of the studs for the manifold,good luck,enjoy!
if at first you don't succeed,you should probably give up
its not hard at all. its very straightforward and if you run into problems just do what i did and post on here. you'll have a solution within 15 minutes. the only part of the install that really gave me trouble was the fuel lines. i didn't have a disconnect tool and it took me forever to get the damn things unhooked.

What the other two have said...fairly straight forward. Myself and two others installed it in my garage in about 6 hours or so. We had to finish the next day as I had misplaced the spacers for the injectors but it's not a tough install.
Fuel lines and belt tensioner will be the hardest things you do I'd say. Watch the studs for the manifold as well as a few folks have snapped them.
Eh...old man with a Corvette now...it was bound to happen sooner rather than later right?
all in all it took me about 8 hours, but i also intercooled it.
Phlatcav wrote:all in all it took me about 8 hours, but i also intercooled it.
Yeah I did my HE after the install and that was a few extra hours there....would have been much easier if I would have done it at the same time! (as Aaron tried to explain to me!)
Eh...old man with a Corvette now...it was bound to happen sooner rather than later right?
like everyone else said pretty easy. i did mine on a sat with one friend.

modify the coolant line that goes to the overflow bottle (3/4" line) prior to gettin everything assembled, makes it a littl bit easier to, other than that we did mine in about 6-7 hours and had it reflashed the same day. Realize you will pay for one hour labor when you take the car in for the reflash.

Yea, like everybody has said its pretty easy, me a couple buddies did it in about 8 hours, but we also played a couple games of football in that time

EXESIVE FIRE (Andy Brooks) wrote:for all of you that snapped studs..
where did you find replacements?
I went to autozone and found some studs longer than the original studs, so I loaded them up with washers, and bolted them in.

m6 to m8 studs , first install i did 2 of them snaped
so i got the m8 bolts from the dealer for the 2.0 s/c motor , drilled and taped the holes for the m8 , and couldnt be happier with the m8's
the dipstick is the other major issue , its a pain to work with
make sure the belt and the hose stay away from each other , the hose that goes to te coolant bottle

I tapped my M6 before installing the stud, that helps much, never had an issue with snapped studs, or even gettting close to smapping them.

thanks everyone for the re-assurance......
I have a show on the saturday so i wanted to get this done during the week but didn't want to be up all night on a wednesday or thursday night then have to go to work the next day.
However it looks like me and my buddies are gonna go at it thursday night! Yahoooo and I've booked my re-flash for 7:30am the next day mmmmmmm
What else do I need for the reflash? I've heard something about charger VCN? Where do I find that?
Thanks again everyone! Stay tuned for pics and what not, hehehe

Marchi1 wrote:I tapped my M6 before installing the stud, that helps much, never had an issue with snapped studs, or even gettting close to smapping them.
mine snapped right where the m8 is cut down to the m6 , putting the studs in the head wasnt a problem
they snapped when i was putting the intake and tightening it down

Ok so this thing was a bitch, plain and simple. I could have done at least TWO M45 installs in the time it took to do this one. On the plus side, no broken studs.
Now...the bypass valve diaphragm. There are two lines to it. One is obvious, right from the housing. The other goes....where? It's a vacuum line to nowhere. Any ideas?
The PCV hose is also unhooked at this time because there isn't an intake fabbed up yet, there's just a filter on the end of the TB, we'll take care of that later. The hose is tucked behind the charger assembly and out of sight, looks like it's plugged in so the smog cops don't see it as being blaringly obvious.
So ya...about that other vacuum hose to the bypass diaphragm...where the @!#$ does that go?


14.330 @ 96.37mph
BlownBlackZ wrote:So ya...about that other vacuum hose to the bypass diaphragm...where the @!#$ does that go?
Thanks Bill........ yah where does it go?

1 stays open , the other goes to the port on the intake
you gotta remember these came from the cobalt ss/sc and ion redline , and they use a boost by-pass solonod , which limits boost , that J's dont have the electronics for it , so its not hooked up , and the port on the by-pass valve goes no where

Thats what we were thinkin too, just seemed odd.
So did most people just tuck it in behind to hide it? Or cut it off?

i just left it alone
GM wanted you to put a 90 on it , which im guessing is just to keep stuff out of it
just DO NOT PUT A CAP ON IT , it has to stay open for the by-pass to fuction correctly


