How to: turbo charge your LD9 - Boost Forum

Forum Post / Reply
You must log in before you can post or reply to messages.
How to: turbo charge your LD9
Sunday, September 14, 2008 4:45 PM
i did this write up for my other forum, DesertTuners.com, so i figured id share it with the rest of the j-bo community

Warning! Turbo charging your motor takes a lot of time/work. Do not expect to have it done in a day. Provide yourself ample time & space. It is also wise to have another vehicle incase you need transportation for work, school, parts run ect.

I am in no way responsible for any issues you may encounter while doing it. This is merely a synopsis of the procedure I used. You might run into problems not noted here or find ways that a better/more convenient for you.

To start here is a list of most of the stuff I did/installed in the process of my turbo build;

NEW ENGINE
LUK pro gold stage 2 performance clutch
garrett t3 super 60 turbocharger
str turbo manifold
forge manual boost controller
38 mm external waste gate
tial 6psi waste gate spring
38mm turbo XS stainless steel dump pipe (not ran back into exhaust)
apex-i gt spec front mount intercooler
integrated engineering 2.5inch intercooler piping
braided stainless steel oil lines
earls oil line fittings
greddy type rs style blow off valve
silicone vacuum lines
high flow air filter
brass air-charge sensor
custom 2.5 turbo-to-cat exhaust
apex-i n1 cat back exhaust 2.5 inch
re-routed fuel lines
re-routed coolant line
removed cruise control for turbo clearance
k&n oil filter


As you go through my list you’ll notice that I did not use an engine management system, different injectors, or any aftermarket internals for the engine. For my build the target range I was going for was 4-6psi. Such a little amount of boost does not require aftermarket fuel upgrades. It is recommended, but not necessary. Also i would reccommend a wideband for the tune/ more accurate A/F ratio.

**note** I did my oil lines at the very end incase I ran into problems where the turbo wouldn’t work, that way I could just put all my stock stuff back on.. You may want to do them right after installing the turbocharger, the choice is yours.

Step 1: DEMO!!! Definitely the easiest & most fun part. Well it was the most fun for me at least, I had no directions or run through of how I should do anything so taking @!#$ apart was one of the most productive things I did

What to do… drain oil/coolant. then pull off… complete intake system (from throttle body to inner fender). Exhaust manifold & down pipe. Ignition cover (makes it easier to work around). Cruise control module, I had fitment problems so scrapped it, you can always relocate it but I decided not to. Remove dipstick. (2? small bolts then just slides out with a little force). Remove front bumper.


The first actual part I installed was the turbo manifold. It bolted up no problem and I reused the stock gasket. Gm has a specific way that you’re “supposed” to tighten/remove the bolts. It doesn’t matter. Just hand tighten all, tighten down all, final tighten/torque down bolts. Also, you will have to cut/alter your coolant line that attached to the stock manifold. I simply cut it down and added some head wrap to the line. Never had any issues.


Also while I had the coolant drained I painted/cleaned out my reservoir.


Installation of external waste gate. Its only 2 bolts simply tightened with the appropriate hex fitting. (if you run an internal waste gate you can skip this step. There is a part called a wastegate block off flange that you can purchase from vibrant performance for pretty cheap, simply a steel piece/ gasket that blocks this section off.


Turbocharger installation. bolt both the oil feed/drain pieces to the turbo BEFORE you bolt it on. Will save you a lot of trouble. Apply gasket, both on.


Run your vacuum line from the turbo to the wastegate.


Mount your intercooler. I would recommend doing this before you even try to test kit any charge pipes. Make sure it’s centered where you want it and hidden appropriately. (my intercooler is enormous and hard to hide lol)

You can use all kinds of things to mount it, whether it be clamped, actual mounts made, bolted to the reinforcement bar, or held in place with steel cord to the X-reinforcement bar like I did my first time around haha.


Here are the different sections of pipe I made/used….

Throttle body down


Behind radiator to intercooler.


I had to cut out a piece of plastic for this to sit where I wanted it.


Where the pipes met.


Where it met the intercooler


Now onto the other side of the intercooler. Here was my first pipe


The 90 degree elbow I used and the pipe that went through into the engine bay.


The pipe going to the turbo.


And now the pipe connected to the turbo itself.


The next section of pipe is going from the turbocharger to the air filter. You COULD leave this open if you only plan to use it for race/track use. Otherwise use a filter that way you don’t suck all kinds of crap through the engine under regular driving conditions

I used 2 90degree couplers with a 3(ish)inch piece of pipe in between them for strength


Now run another piece of pipe to where your filter box originally sat and place the filter on the end. Test fit, make sure everything sits correctly.


Choose a suitable place for your blow off valve. This is where I placed mine, it was a simple cut out one piece replace with another for me.


This is where your vacuum line will need to be branched/attached.


Now remove the pipe you would attach your air filter to. Drill a hole/place a rubber grommet for your air charge sensor.


Also place a connection for your manifold vacuum hose, I used a connection off an old intake system for ease && ran in next to my power steering


Oil lines!!! These are kind of important, so don’t cheap out on them. If an oil line fails your turbo could fail, engine could blow, ect ect and your S.O.L.

Stainless steel braided oil lines, earls or comparable fittings. Also misc. fitting from home depot (the ones I received with my feed line were crap, I went to the plumbing section and got all new brass ones).

Here is how you should connect feed line, it also might be a good idea to put a restrictor valve on there so you can regulate the amount of oil going to the turbo.


Connect to the top of the turbocharger.

For the oil return line you want it to run as straight down as possible. Gravity returns the oil to the pan so don’t make a bunch of unnecessary turns. You can either drill the oil pan or run it back through the dipstick. I made a custom dip stick with copper piping because u did not want to drill my pan. Higher boost applications: DRILL YOUR PAN.

Here is the line going down, also a good pic to see the vacuum line attached from the turbo to the wastegate.


A picture of the line with the engine out of the car (the line was shortened again after this pic was taken). In addition, I had the exhaust started and welded to the existing cat/exhaust. (It looks like crap but worked very well lol) the yellow indicated roughly how it was after I fixed the line


While you’re getting the exhaust done you can have the wastegate down pipe ran into the exhaust, or just vent straight down. Again, the choice is yours. I vented mine straight down with this…


Here is my boost controller. It was added later. It replaced the line from the turbo to wastegate. Run the lone from the turbo to the controller then from the controller to the waste gate. Same concept would apply with an internal wastegate instead of an external.

*note* boost controllers can only increase boost. your internal/external wastegate will be set for a certain psi. the lowest you can go is to that original psi level and then increase it from there.


Refill liquids. Make sure boost is set at LOWEST setting. Get tuned. Drive.

End product! Hope this helps a little, im sure I forgot a bunch and will be back in to edit it 400 times haha. So don’t flame me to bad if you think it’s a @!#$ty write up




Eat my shift

Re: How to: turbo charge your LD9
Sunday, September 14, 2008 6:52 PM
nice wirte up.. the only thing i am gonna pic out is should of used t-bolt clamps and i don't like how the pipe comes out of the intercooler on the cold side, to much of a strain on the coupler... other then that it looks good. i like the manafold, it's sharp.


Re: How to: turbo charge your LD9
Monday, September 15, 2008 8:24 AM
Over all nice setup, but holy rediculous amount of couplers. I would ask around you city and find a welder. I got all mine welded and being intercooled I only have 4 couplers in my system ..... 1 at the throttle body, 1 in the fender, and 1 at each side of the intercooler, my turbo is a 16g so its a bolted connection there.

but good job!
Re: How to: turbo charge your LD9
Monday, September 15, 2008 2:07 PM
Holy Ebay!


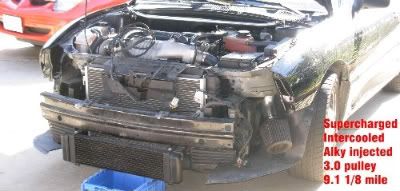
- 93 mph in the 1/8 mile
Member of J-Body Of Michigan.

Re: How to: turbo charge your LD9
Monday, September 15, 2008 6:08 PM
Skilz10179 wrote:Holy Home depot!


Re: How to: turbo charge your LD9
Monday, September 15, 2008 6:30 PM
this was from when i first installed everything last september. quite a few parts were swapped/changed since it was in.

either way it did its job and i was quite happy with it


Eat my shift
Re: How to: turbo charge your LD9
Monday, September 15, 2008 9:00 PM
You have the air temp sensor in the wrong spot...should be post turbo. Really L------O-----N------G charge pipes but the BOV is in the right place if that condition is present so ok.
T-bolts would go a long way for durability and no mention of tuning or even a AFPR for that matter. I'd say you gotta drop another $1k+ at it before I'd call it done not to mention (suspension)/wheel/tire (drive train)/clutch/LSD mods to handle the added power. Gauges? wideband?
But nice write up!

You got A LOT more $$$ to drop to finish it up but it should be fun when its done!

EDIT: I know you might have alot of the stuff I listed but we seriously have alot of newbs who think they can drop $700.00 on ebay and walk away with a reliable 300hp cav. NOT THE CASE - which I think the wrong people can get the wrong idea from this post.

I think I can say a proper reliable 300hp cav will be upwards of $6k invested in total mods in just the engine,drivetrain,tuning and gauges still not including suspension wheels and tires.

Edited 1 time(s). Last edited Monday, September 15, 2008 9:06 PM
Re: How to: turbo charge your LD9
Monday, September 15, 2008 10:08 PM
Joshua Dearman wrote:You have the air temp sensor in the wrong spot...should be post turbo. Really L------O-----N------G charge pipes but the BOV is in the right place if that condition is present so ok.
T-bolts would go a long way for durability and no mention of tuning or even a AFPR for that matter. I'd say you gotta drop another $1k+ at it before I'd call it done not to mention (suspension)/wheel/tire (drive train)/clutch/LSD mods to handle the added power. Gauges? wideband?
But nice write up!

You got A LOT more $$$ to drop to finish it up but it should be fun when its done!

EDIT: I know you might have alot of the stuff I listed but we seriously have alot of newbs who think they can drop $700.00 on ebay and walk away with a reliable 300hp cav. NOT THE CASE - which I think the wrong people can get the wrong idea from this post.

I think I can say a proper reliable 300hp cav will be upwards of $6k invested in total mods in just the engine,drivetrain,tuning and gauges still not including suspension wheels and tires.


like i said at the beginning of the post, merely a synopsis/summary of what i did. but yeah i got you that peeps might get the idea that a few hundred dollars will give a reliable car... absolutely not.

sensor never gave me any problems/codes

i mentioned fuel upgrades should be done and to tune before driving

rebuilt the motor, stage 2 clutch, performance tires, gauges, suspension, trans service were all done to the car.

i didnt add all that in cuz it was just a boost build write up to me

thanks for the honestly so far guys


Eat my shift
Re: How to: turbo charge your LD9
Tuesday, September 16, 2008 12:23 AM
Nice write-up!

What kind of times are you running with that setup? And I'm guessing you haven't dynoed it yet?

Joshua Dearman wrote:You have the air temp sensor in the wrong spot...should be post turbo. Really L------O-----N------G charge pipes but the BOV is in the right place if that condition is present so ok.
T-bolts would go a long way for durability and no mention of tuning or even a AFPR for that matter. I'd say you gotta drop another $1k+ at it before I'd call it done not to mention (suspension)/wheel/tire (drive train)/clutch/LSD mods to handle the added power. Gauges? wideband?
But nice write up!

You got A LOT more $$$ to drop to finish it up but it should be fun when its done!

EDIT: I know you might have alot of the stuff I listed but we seriously have alot of newbs who think they can drop $700.00 on ebay and walk away with a reliable 300hp cav. NOT THE CASE - which I think the wrong people can get the wrong idea from this post.

I think I can say a proper reliable 300hp cav will be upwards of $6k invested in total mods in just the engine,drivetrain,tuning and gauges still not including suspension wheels and tires.


Would I be wrong if I'm guessing he's getting about the same power out of his setup as the GM Supercharger Kit (maybe a bit more, boost here is about 1 to 2 psi higher than the GM Kit, iirc)? If so, THEORETICALLY one would be alright putting this setup onto a previously stock Cav. Don't get me wrong, I am no where near a boost expert which is why I ask these questions...that, and a good friend of mine has been trying convince me to do a setup almost identical to this one for about a month or two lol


15.448 @ 89.7
Re: How to: turbo charge your LD9
Tuesday, September 16, 2008 9:55 AM
yeah...nice pics..lots of info for people just getting into it. probably a lot of planning and all that went into this.

BUT...im not feeling all that charge piping, what are those black 90° things your using. never seen those.


in the long run...performance/effort wise you should have snatched up a supercharger kit used and been done.


unless your like me and think cars that whine are fo bitches' turboing a car is almost worth just the blow off noise.

did you ever take this to a track????


Re: How to: turbo charge your LD9
Tuesday, September 16, 2008 10:25 AM
Liquidplamsa wrote: what are those black 90° things your using. never seen those.


I think they are elbows for connecting Toilet PVC piping.

I saw them at Home Depot when I re-did some plumbing at my first house...


Member of JBO - 9 Years & Counting...

Re: How to: turbo charge your LD9
Tuesday, September 16, 2008 11:03 AM
HA....really ...ummmmm.....creative


Re: How to: turbo charge your LD9
Tuesday, September 16, 2008 11:05 AM
homemadeturbo.com


Re: How to: turbo charge your LD9
Tuesday, September 16, 2008 11:18 AM
Sorry, thanks for the write-up, but that install/setup looks so haggard it's not funny.


Re: How to: turbo charge your LD9
Tuesday, September 16, 2008 12:22 PM
Agreed with above. Kudos for the writeup... but that is far from an optimal install for a newb to base their own project off of. Couplers galore, questionable parts, improper placement of a few things... and far more charge piping than necessary. You did go into good detail and I CAN see some good parts there so... I don't get whatsup. It's like you ran out of money halfway and hit up home depot to finish things up instead of doing it right. (i.e properly routed charge pipes with NO rubbing against any vibrating/moving engine componant)

Also, draining your oil return into the dipstick? NOT a good idea on an LD9... the dipstick hole in the block is not anywhere near large enough to deal with 1/2" - 3/8" of oil coming down a properly sized return line. No modification to the dipstick can fix this short of modifying the block.

It's a good start but it's not a good how to in terms of the pictures and some of the parts used.

I have to say tho - nice manifold! Very nice.

Honestly, get a lot of those pipes welded and cleaned up and use t-bolt clamps and the setup will look a LOT better. Watch out for the oil sending line - it's braided it'll rub through anything it touches. (I see it's up against the fuel lines) Also, that intake pipe for the turbo running over the engine like that is a bad idea in that it's right against your fuel lines as well as it's picking up ALL the heat from the turbo. I can't even imagine how hot the air is that's going into it to be compressed and heated up even more through kinetic energy.

Lastly - as suggested - move the IAT to just before the throttle body where it belongs. Use the Camaro threaded iat with a bung in the pipe. I can guarantee you that your IAT readings are 100% off which is affecting your spark timing.

-Chris-


-Sweetness-
-Turbocharged-
Slowly but surely may some day win this race...
Re: How to: turbo charge your LD9
Tuesday, September 16, 2008 1:04 PM
I want to add to this. I know alot of this was already mentioned but it is important so I want to say it again.

- Turboing a car is not cheap and is not something you want to rush. Do it right the first time regaurdless of how much it costs or how long it takes. You will need another form of transportation during the process.

- Worm clamps should never be used. T bolt clamps only. Buy these before hand at a performance shop or online (your auto parts store probably will not stock them)

- Don't use exhaust pipe for charge pipe. It weighs much more which sucks in and of itself and it also is more strain on the couplers and is a dead give away it was a hack job.
(Exhaust pipe was not used in this example. Just mentioning it out for the newbs who read this)

- I would recommend buying 2 universal pipe kits from ebay. (one kit most likely won't be enough) They will have an assortment of angles and straights

- When buying couplers DON'T CHEAP OUT. The cheap ones are all but garanteed to split at the worst possible time.

- Weld as many of the bends together as possible. Not only does it look 10x better it is one less place for a coupler to fail.

- You do want at least couplers in 4 places. Both ends of the intercooler and at the turbo and the throttle body. Remember the intercooler is mounted to the front of the bumper or frame which does not rock with the engine. Your engine will rock some even with stiffer mounts. You must be able to have some room for the pipes to flex at the couplers.

- Use aftermarket mounts. It will help with the above mentioned as well as not flexing your exhaust from engine movement as much.

- A quick note about ebay. Beware there are more fake name brand parts (knock-offs) then the real deal. If it says for example HKS style then it is not an HKS no matter how close it resembles the real things. Alot of the fakes look nearly identical to the genuine so make sure you know what to look for to tell the fakes from the real. You still get what you pay for even on ebay. As always do your reserach on the seller. If you are not sure if a part isa good price or the reall deal or you are unsure of the seller/brand ask on here before you buy it.

- Your IAT sensor should never be tricked by means of resistor or improper placement. You want it to read the actual temperature of the air entering the throttle body. The best place is right before the throttle body. Having an accurate temp reading will give you a much better idea of your actual Intake Air Temp. This is usefull to know when determing improvements made to cool the air charge such as upgradeing the intercooler, intercooler spray bar, bigger turbo, alky injection, ect. Since your IAT sensor is or should be in the chrage pipe you will want to thread it in. Most people use the F-body (camero/fireturd) Iat sensor since it is threaded instread of push in like ours and uses the same electirical connector. For a clean look install it on the bottom of the pipe so it points down and is not visible.

- On the 2.4 the stock oil presure sensor is all but worthless. You can go without it or if you really want to know your oil presure get an oil presure gauge.

- An oil restrcitor must be used when using that as the oil feed source.

- A wideband o2 gauge is a must have. AEM UEGO is popular. It is what I use. There are other brands such as Inovate, Zeitronics ect. The brand is not important what is is that you have one.

- A quick note about ebay. You are taking a risk. There are legit sellers who are well known on here. With them you know you will get the genuine part with out being screwed but it may cost a few bucks more. Beware there are more fake name brand parts (knock-offs) then the real dea on ebay. If it says for example HKS "style" then it is not an HKS no matter how close it resembles the real things. Alot of the fakes look nearly identical to the genuine so make sure you know what to look for to tell the fakes from the real. You still get what you pay for even on ebay. As always do your reserach on the seller. If you are not sure if a part is a good price or the real deal or you are unsure of the seller/brand ask on here before you buy it.


Edited 1 time(s). Last edited Tuesday, September 16, 2008 1:11 PM


FORGET GIRLS GONE WILD WE HAVE GOVERNMENT SPENDING GONE WILD!

Re: How to: turbo charge your LD9
Tuesday, September 16, 2008 2:08 PM
m2..MY CAR IS SLOW= wrote:
sensor never gave me any problems/codes

i mentioned fuel upgrades should be done and to tune before driving

rebuilt the motor, stage 2 clutch, performance tires, gauges, suspension, trans service were all done to the car.

i didnt add all that in cuz it was just a boost build write up to me

thanks for the honestly so far guys


The sensor WONT EVER give you codes unless its disconnected, all it does is tell the ECU what the intake air temp INTO THE CYLINDERS is. Pre-turbo air temp is FAAAARRRR from the real # since the compressor increases temp drastically hense the need for the intercooler....you need to relocate the sensor to post compressor & post intercooler.
Re: How to: turbo charge your LD9
Wednesday, September 17, 2008 11:31 AM
I wouldnt want my pipes overlapping the exhaust manifold like that.. Its just heating up the pipes, thus heating up the air inside the pipes.. But I understand everyones setup is going to be different.. I hope this setup is beneficial to you.


~2014 New Z under the knife, same heart different body~
______________________
WHITECAVY no more
2012 numbers - 4SPD AUTOMATIC!!
328 HP
306 TQ
Re: How to: turbo charge your LD9
Wednesday, September 17, 2008 11:50 AM
it does matter how you tighten exhaust manifold bolts btw. general rule of thumb is work from the middle to the outsides.


87 Firebird
All stock...........lol.
Re: How to: turbo charge your LD9
Wednesday, September 17, 2008 7:04 PM
STR turbo mani?? more info on this please.

looks cast....


Fall 08 Omaha/western Iowa area meet...CLICK ME!
Re: How to: turbo charge your LD9
Thursday, September 18, 2008 1:16 PM
randizzle wrote:it does matter how you tighten exhaust manifold bolts btw. general rule of thumb is work from the middle to the outsides.


my buddy worked as a tech for gm. said it doesnt really matter.


z yaaaa wrote:STR turbo mani?? more info on this please.

looks cast....


speed track racing. cast iron manifold, comes with 5 year warrenty against cracks/breaking.

its like 225 or 250 shipped i dotn remember the price exactly. i have the manifold/intercooler/ boost controller still if youre intrested in parts...


Eat my shift

Re: How to: turbo charge your LD9
Thursday, September 18, 2008 1:47 PM
is it the top mount thats always on ebay??

if not.. do they make a non-top mount?


Fall 08 Omaha/western Iowa area meet...CLICK ME!
Re: How to: turbo charge your LD9
Thursday, September 18, 2008 3:59 PM
I look forward to using this guide when I work on my car this winter.


BeardLife / Club Awesome Reject Blog
Re: How to: turbo charge your LD9
Friday, September 19, 2008 4:35 AM
Qwik2k2z24 wrote:I look forward to using this guide when I work on my car this winter.


what a dick...


Re: How to: turbo charge your LD9
Friday, September 19, 2008 6:52 AM
Liquidplamsa wrote:
Qwik2k2z24 wrote:I look forward to using this guide when I work on my car this winter.


what a dick...


yupp, gotta love the org..


Eat my shift
Forum Post / Reply
You must log in before you can post or reply to messages.


Start New Topic Advanced Search