custom gauge pod-HOW TO - Interior Forum

Forum Post / Reply
You must log in before you can post or reply to messages.
custom gauge pod-HOW TO
Sunday, January 14, 2007 7:52 AM
first time doing a how to so bear with me.

First you have to figure out where and how you want to mount your gauge, then make sure that you can run your wiring and get those little a$$ nuts on the back of the stupid thing once you get the pod done.
I chose the drivers side inside mirror panel.

Materials:
gauge....duh
gauge cup. if you cant find them i will cover how to make them later
masking tape
spot putty
body filler
fiber glass resin and MEKP hardener
fiber glass mat
sand paper.... 100+250 dry,400+800 wet will do fine
card board
junk playing card
utility knife
cheap brush approx 2" wide
mixing cup
putty knife or similar tool to mix and spread body filler
dremel rotary tool is a life saver
palm sander, also a life saver
water spray bottle
neoprene gloves
safety glasses
respirator
can of primer

now im gonna play shop teacher for a second, remember just like in high school..... SAFETY FIRST always wear glasses, respirator and gloves when sanding or working with filler/ glass, the fumes and dust can really mess you up.
there, now that thats out of the way...........

step 1:
put the gauge in the gauge cup and position it how you want, then tape it down so it wont move. NOTE. you may have to cut a hole in the piece your using for a base.

step 2:
mix a small amount of body filler and spread it in aroung where the cup meets the base piece like so..
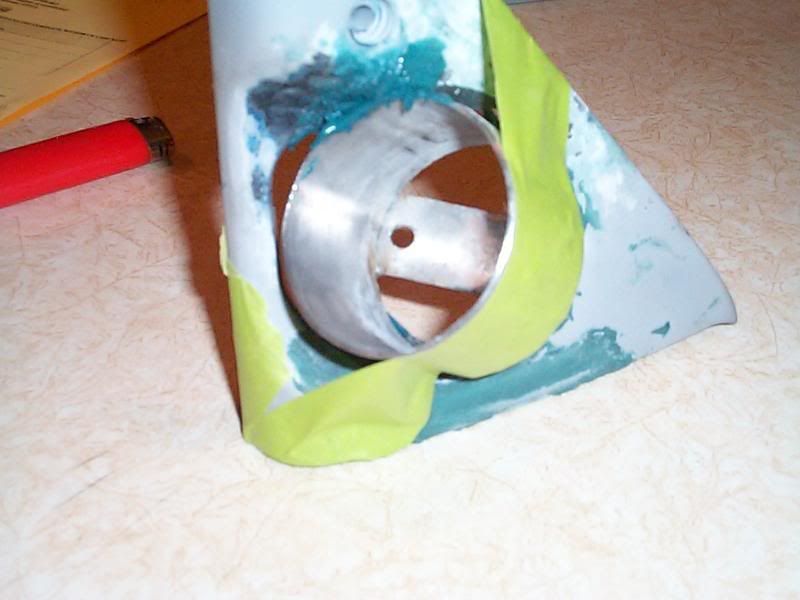
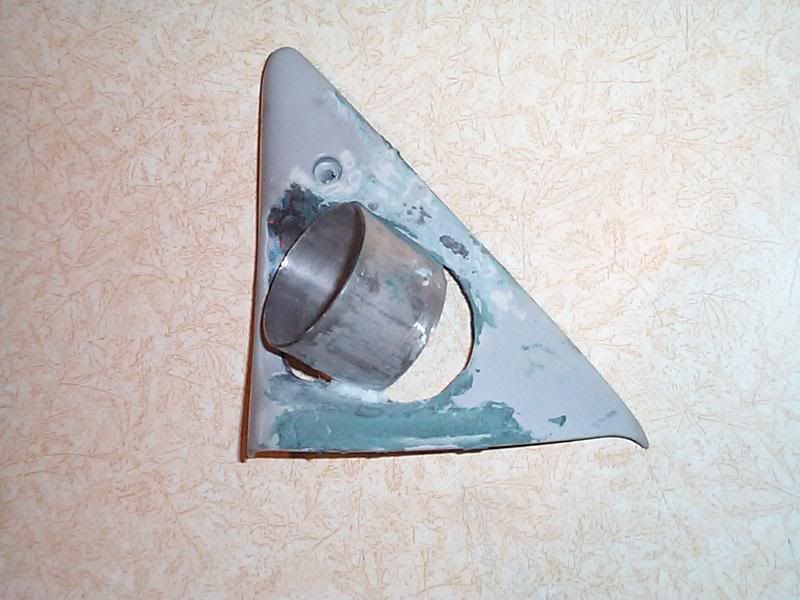
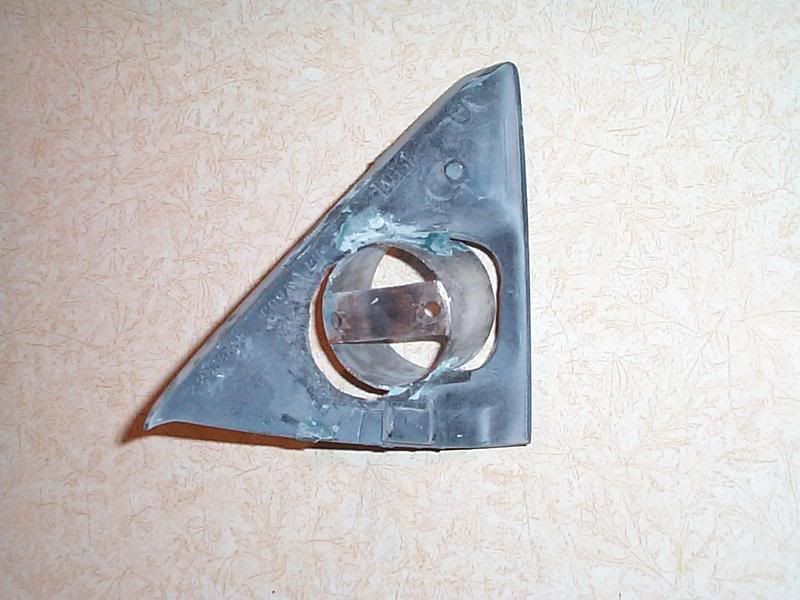
let the filler dry and remove tape.

step 3:
put back in vehicle and check positioning/ fitment

step 4:
fill around the cup to begin adding shape and support
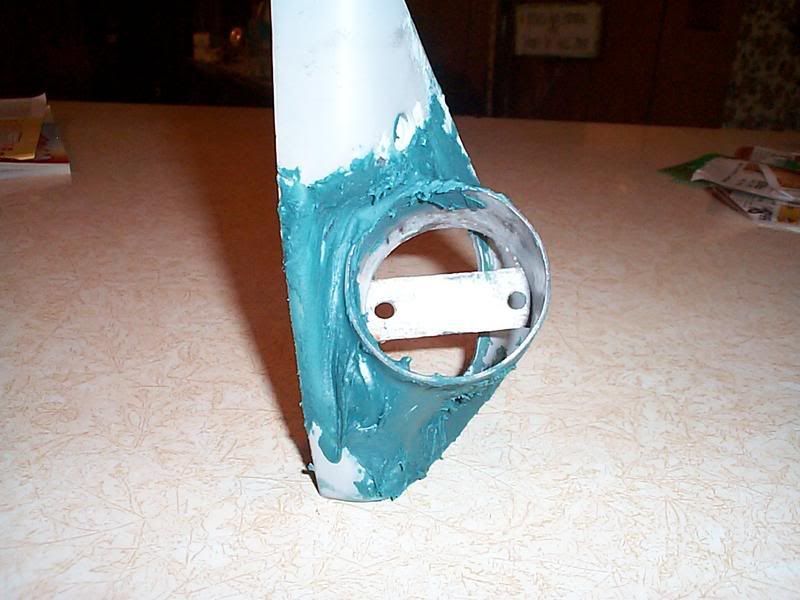


step 5:
make sure gauge still sits properly in cup. then remove

at this point it should look something like this


step 6:
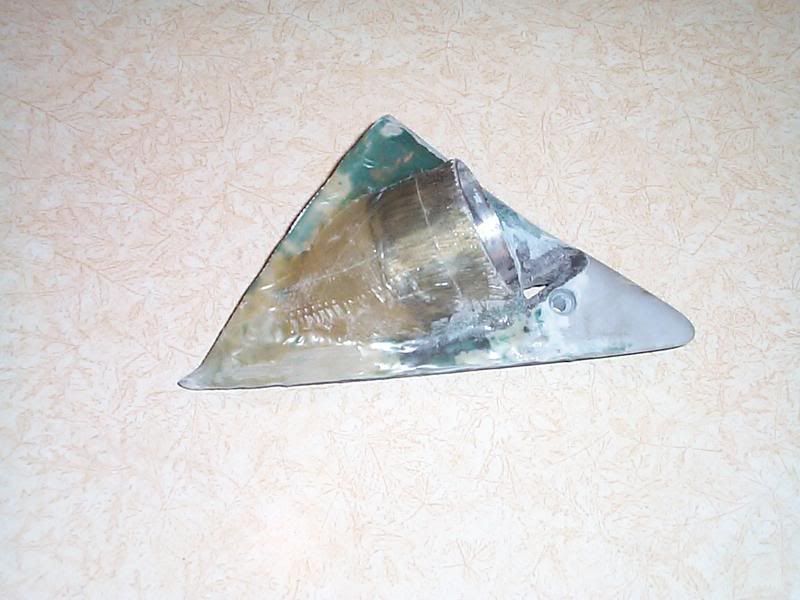
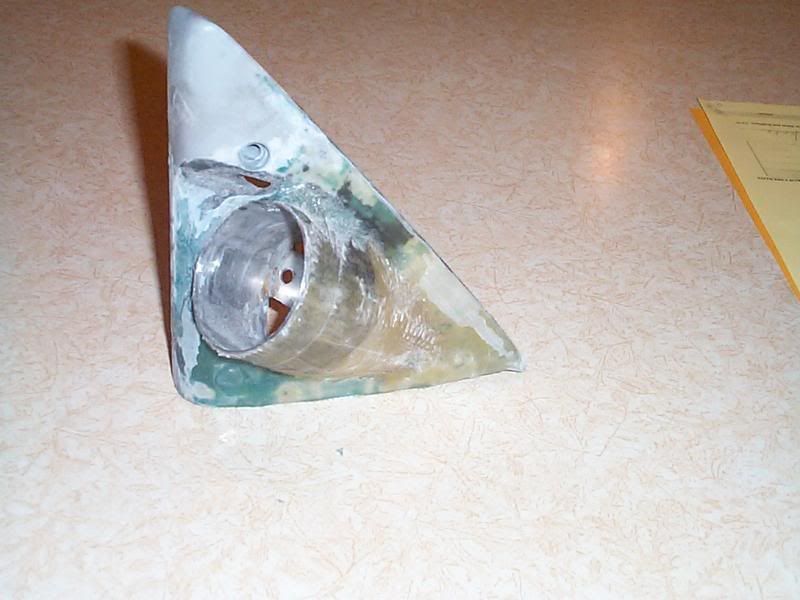
cut 2 triangles out of the fiberglass mat large enough to over lap the edges of the hole by 3/4 of an inch and come at least 3/4 of the way up the cup.

step 7:
now mix a small amount of resin and brush onto the pod where you are going to be laying fiber glass.

step 8:
carefully lay one of the pieces you cut over the hole and press down all the edges, while holding the mat on to the cup brush resin into the rest of the mat. alternatively you can dip the mat in the resin and then position it how you want it. while the first piece is still wet, put your second piece directly over top of it and brush the resin in or dip it and stick it. MAKE SURE YOU GET ALL THE AIR BUBBLES OUT.

after about 3 hours dry time it should look like this


step 9:
sand off any sharp edges and high areas

step 10:
check fitment of both pod and gauge and remove

step 11:
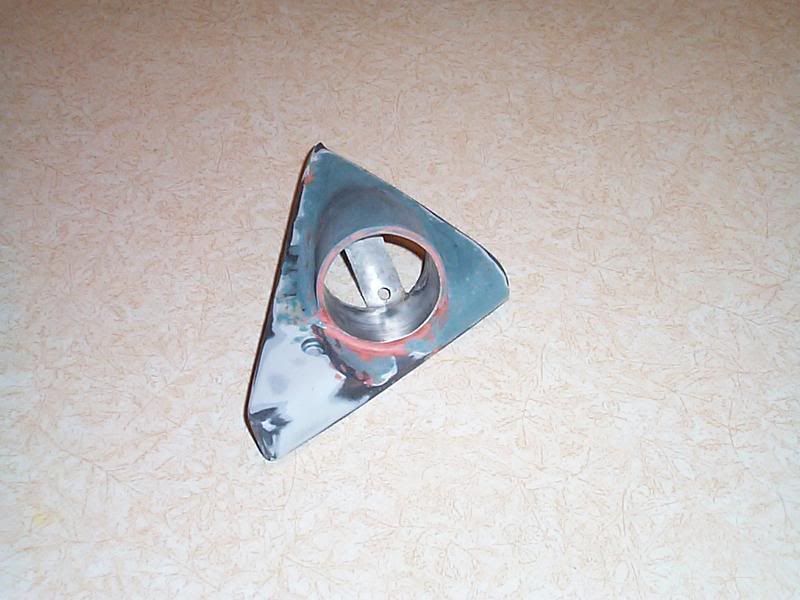
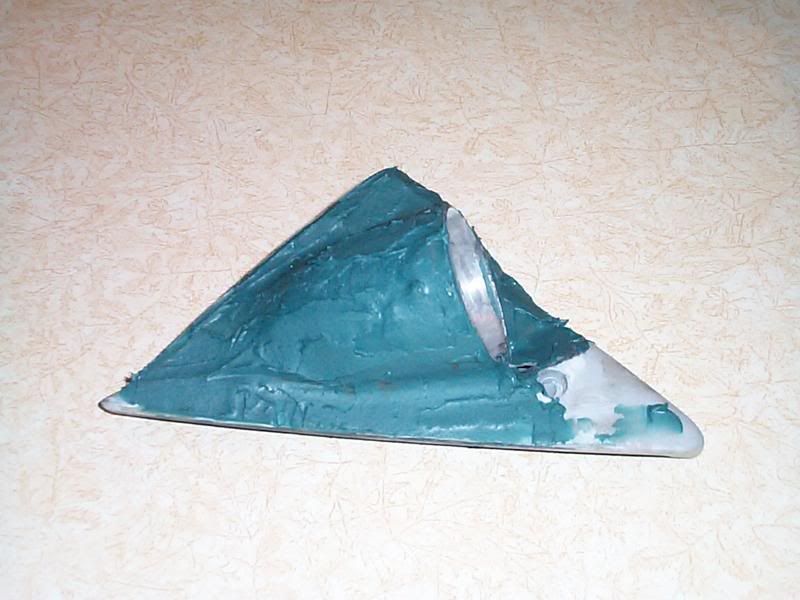
mix up some body filler and spread it over the pod, try not to make it to thick or thin in any particular area, and try to keep it as smooth as possible, it means less work later

after that dries it should look like this


step 12:
sand the filler down so that its smooth, if you find any deep lines or holes, blow the piece off and fill them, then sand again

step 13:
at this point there shouldnt be any big pits or deformity's in your pod and it should have a nice shape to it, to fill all the little pits, use a junk playing card and some spot putty/ glaze. squeeze about a tooth paste amount out onto a piece of cardboard and with the playing card press the putty into the pit and scape the excess off, leaving just a thin film across the surface. allow approw 1.5 hrs for dry and cure time

step 14:
take the water spray bottle and fill with shower temp water. now go out side and spray the pod and the 400 wet/dry paper. now sand the pod until all the tiny bumps and ripples are gone. dont forget to spray the paper and pod clean every once in a while.... while sanding, this keeps the paper from clogging up. at this point the surface should be smooth and ready for paint if not, use the spot putty to fill and repeat.

at this point the pod should look like this


step 15:
now your ready to prime. let the piece dry for at least 3 hours to get all the moisture out then hang from a wire and spray it with a medium coat of primer after 20 mins, add another medium coat. then let dry for 3-4 hours

step 16:
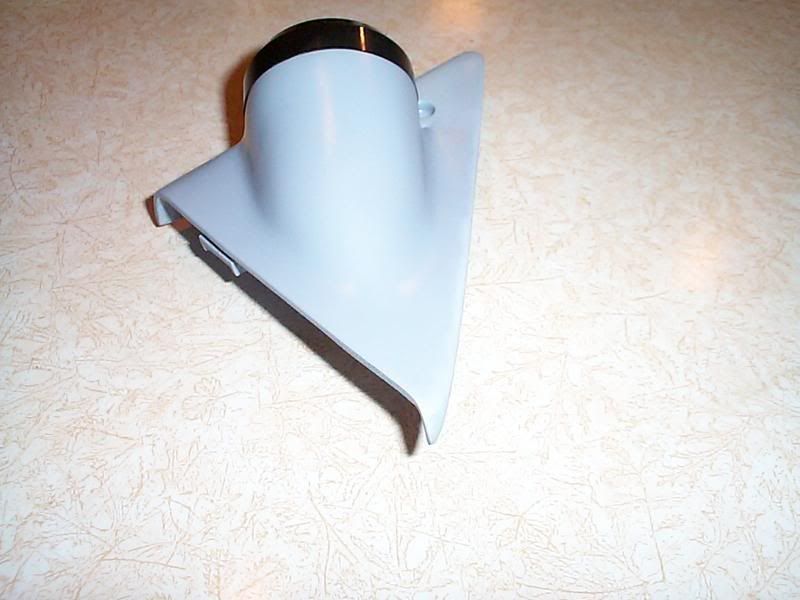
same as step 14 but use the 800 wet and sand the primer till its smooth as glass

at this point it should look like this


step 17:
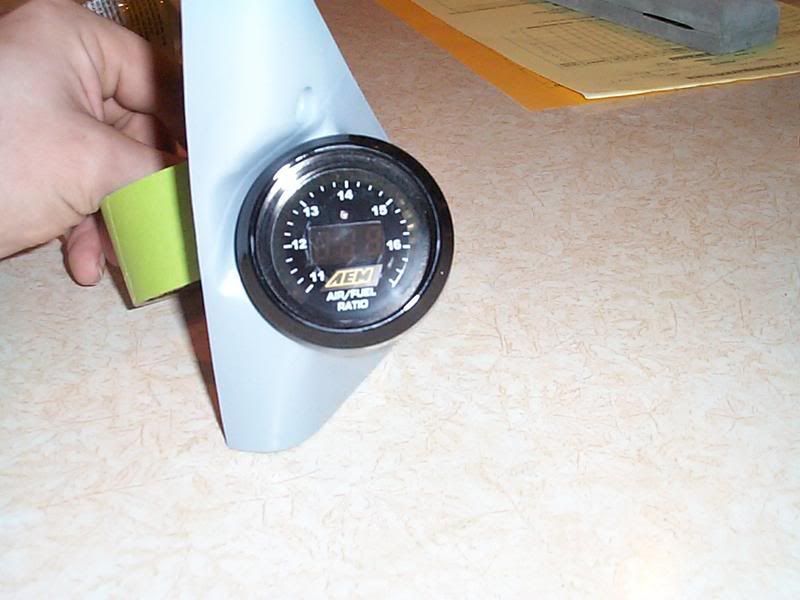
let dry for 2-3 hours then paint with what ever you want. for better results wet sand the paint with 2000 and use a polishing compound to make it shine. then clear coat it if you want and your done.

well that should be it. if i forgot anything feel free to add.


many changes in the making
my favorite part about doing bodywork,.......... bondo bugers

Re: custom gauge pod-HOW TO
Sunday, January 14, 2007 8:16 AM
my only concern is the first layer of body filler....won tit crack?


My car may run 18s, but I can do your taxes in 10 seconds flat.
JBO lube - they would never have enough in stock and we'd never see RodimusPrime again
Re: custom gauge pod-HOW TO
Sunday, January 14, 2007 8:44 AM
do you mean from step 2????, thats just there to hold it until you fill around it, not to mention, im using evercoat short hair reinforced body filler, the first time i set it, the position was off and i used less than what you see in the picture and it actually took a lot to break it free, but like i said once you fill around it, its as solid as a rock........... damn i forgot the home made gauge cup how to.....hhhhmmmm maybe later if someone asks for it


many changes in the making
my favorite part about doing bodywork,.......... bondo bugers
Re: custom gauge pod-HOW TO
Sunday, January 14, 2007 9:51 AM
Wow, maybe I could do that myself, lol. Looks good, man, and well written. Do you have any pics of it installed?
Re: custom gauge pod-HOW TO
Sunday, January 14, 2007 9:53 AM
i would actually like a how to on the cup. that holder you have looks great...how much would you charge for one??


Re: custom gauge pod-HOW TO
Sunday, January 14, 2007 10:27 AM
you can make one in about 20 mins for about $2.00, will do a writ up a little later, gotta do some running


many changes in the making
my favorite part about doing bodywork,.......... bondo bugers
Re: custom gauge pod-HOW TO
Monday, January 15, 2007 12:09 PM
So you don't use any epoxy or adhesive or anything to hold the cup in? That's scary.


Re: custom gauge pod-HOW TO
Monday, January 15, 2007 12:22 PM
maybe its just me or did anyone else see any fiberglass and fiberglass mat? it looks like all body filler.


Re: custom gauge pod-HOW TO
Monday, January 15, 2007 12:23 PM
if you encase the cup in fiberglass then there is no need for anything like epoxy. but this way yes, i do see problems. i have seen people use body filler to get the "shape" but you HAVE to cover everything with fiberglass otherwise it iwll just crack.


Re: custom gauge pod-HOW TO
Monday, January 15, 2007 1:34 PM
BaggedCav98 wrote:maybe its just me or did anyone else see any fiberglass and fiberglass mat? it looks like all body filler.


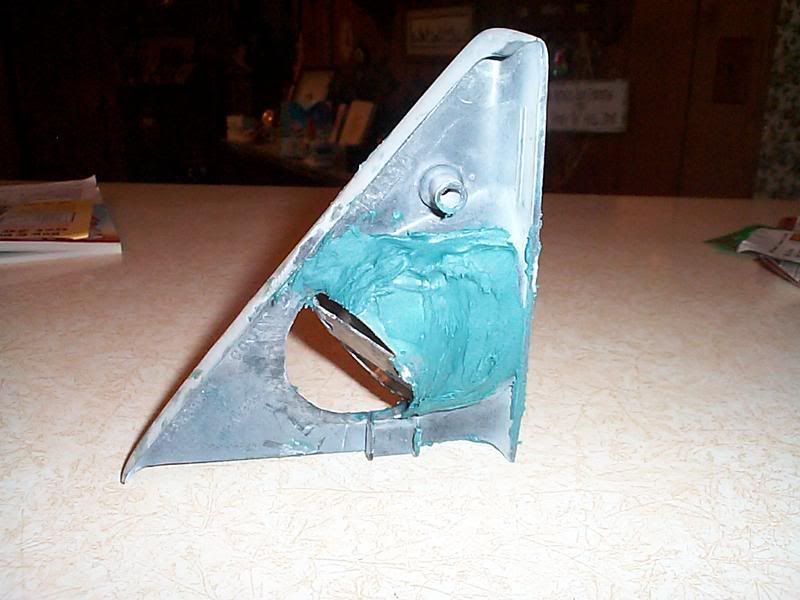
Step 6


Re: custom gauge pod-HOW TO
Tuesday, January 16, 2007 4:28 AM
it is body filler but i used the glass to cover the hole, then covered that with filler, no cracks, its even been dropped once by accident it was a small piece and i couldn't get the shape i wanted using the "traditional" method so i improvised and found a better way, well i think its better anyways. step 5-9 is where the glass comes in, you can see in the pics that its clearly not made entirely of body filler. baller, sorry to correct you but its the other way around, you typically use fiberglass to make the shape and then cover it with body filler to smooth it out, and i did that at step 5, look at the pics a bit more closely and you'll see what i mean, i will photoshop in arrows if i have to but it is done properly and exactly as described, will not crack.


many changes in the making
my favorite part about doing bodywork,.......... bondo bugers

Re: custom gauge pod-HOW TO
Tuesday, January 16, 2007 3:26 PM
if i decided to take orders, how much you u guys be willin to pay for one????, any size gauge in a small removable panel like what i did


many changes in the making
my favorite part about doing bodywork,.......... bondo bugers
Re: custom gauge pod-HOW TO
Tuesday, January 16, 2007 8:19 PM
nice work on the pod man, always nice to see ppl trying to create things on their own. Turned out really nice. I'll take this time to threadjack and highlight my own work:


Re: custom gauge pod-HOW TO
Tuesday, January 16, 2007 11:13 PM
from the top pic, looks like it needed some more smoothing out but not bad.


many changes in the making
my favorite part about doing bodywork,.......... bondo bugers
Re: custom gauge pod-HOW TO
Wednesday, January 17, 2007 9:04 AM
NICE POST ON IT... LOOKS FACTORY
Re: custom gauge pod-HOW TO
Wednesday, January 17, 2007 10:24 AM
who u talkin bout cepress?


many changes in the making
my favorite part about doing bodywork,.......... bondo bugers
Forum Post / Reply
You must log in before you can post or reply to messages.


Start New Topic Advanced Search