Title says it all. I'm looking for pics of anybody who has made a fiberglass cavalier front dash piece with 3 or 4 gauge pods glassed in. I'd also be interested if anybody can make one as well, please PM me.
"Never argue with an idiot. They'll drag you down to their level, then beat you with experience!" -Anonymous
You mean something like this in the bezel area?


Those are just 2 of the 3 I've made during my years owning a cav.

Yup, thats the one. PM me if you can make another.
"Never argue with an idiot. They'll drag you down to their level, then beat you with experience!" -Anonymous
Somebody pm me if they are looking to produce more

pm'd

I NEED a 97-99 LD9 engine harness for an auto.PM if u hav info.!!
god damn what type of paint do you guys use? I used a whole can of filler primer and then almost a full can of black fusion paint and then like half a can of the tripple thick fusion clear and its not that smooth.
03 cavalier
us amps 100hc running at .5 ohms
digital designs 3512
yellow top g34
kenwood ddx-8019
Prep is key, but quality automotive paint from a gun will make a big difference compared to rattle can jobs.
yep sanding and prep is the key. just fyi the one I did was rattle can. spraying out of a gun def makes the difference but if you prep right and paint in light coats it can come out good. I have about 4 coats of high build primer,wetsanded to 400,with 3 coats of black paint.no clear on it yet.

I NEED a 97-99 LD9 engine harness for an auto.PM if u hav info.!!
Like everyone stated, prep work and quality paints are the key to a great finish. I use a skim coat of glaze on top of my finished body work, which I sand up to about 240 grit, then I spray about 2-3 medium coats of Evercoat 2k Epoxy primer (helps for better adhesion to the plastic). sand that to 400, then spray 3-4 light coats of paint (I like the Eastwood Urethane based paints for standard colors).
Here is a picture of the one we are currently working on. This is still incomplete, no clearcoat on it.
Technically it is 3 gauges

Right Tinkles?


FOR SALE
Copycat.
I wanna whore mine too.


Mine needs to be cleaned up and repainted. But it wasnt bad for my 1st time fiberglassing something.
Edited 2 time(s). Last edited Sunday, March 15, 2009 6:26 PM

these are some good looking dashes.....i wish someone would make me one

RIP JESSE GERARD.....Youll always be in my thoughts and prayers...

Got a chance to finish the bezel I posted above with some clear, followed by a 2000 grit wetsand, buffing compound and glaze.
Before Gauges

After Gauges

Side view of bezel and c/f thresholds I have been waiting to do the same process to.

Tinkles will be creating a mold of a bezel like this shortly if anyone is looking to purchase one.

FOR SALE
Drifted Cavy aka: Suicidal Cav wrote:
Tinkles will be creating a mold of a bezel like this shortly if anyone is looking to purchase one.
thats what i like hearing
ʇı ɹǝʍo7 | ǝcoMonstǝrs
My question to all who have done this is what did you do with the center airflow ducts? remove and block-off? These all look great and give me a few ideas.
[http://registry.gmenthusiast.com/images/dmoose/P2250249.JPG/img]
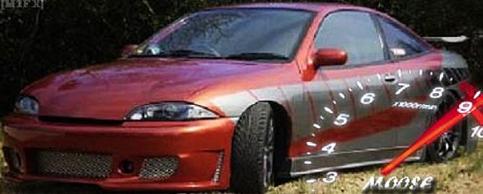
I cut about 3-4 inches off of the duct, made a plastic block off plate and sealed it with epoxy

The car I am building will not be used daily so I have been removing most of the air ducts and blocking them off. Keeping one on the drivers side and one on the passenger side. Removed all lower ducts that go under the seats for the rear passengers as well.

FOR SALE
I kinda figured that's what had been done I have a digital processor that I think I will install there or move my HVAC controls up to there


I just removed the center/passenger side duct.
Tinkles

2003 Cavalier 1SV
Bagged and Blown


