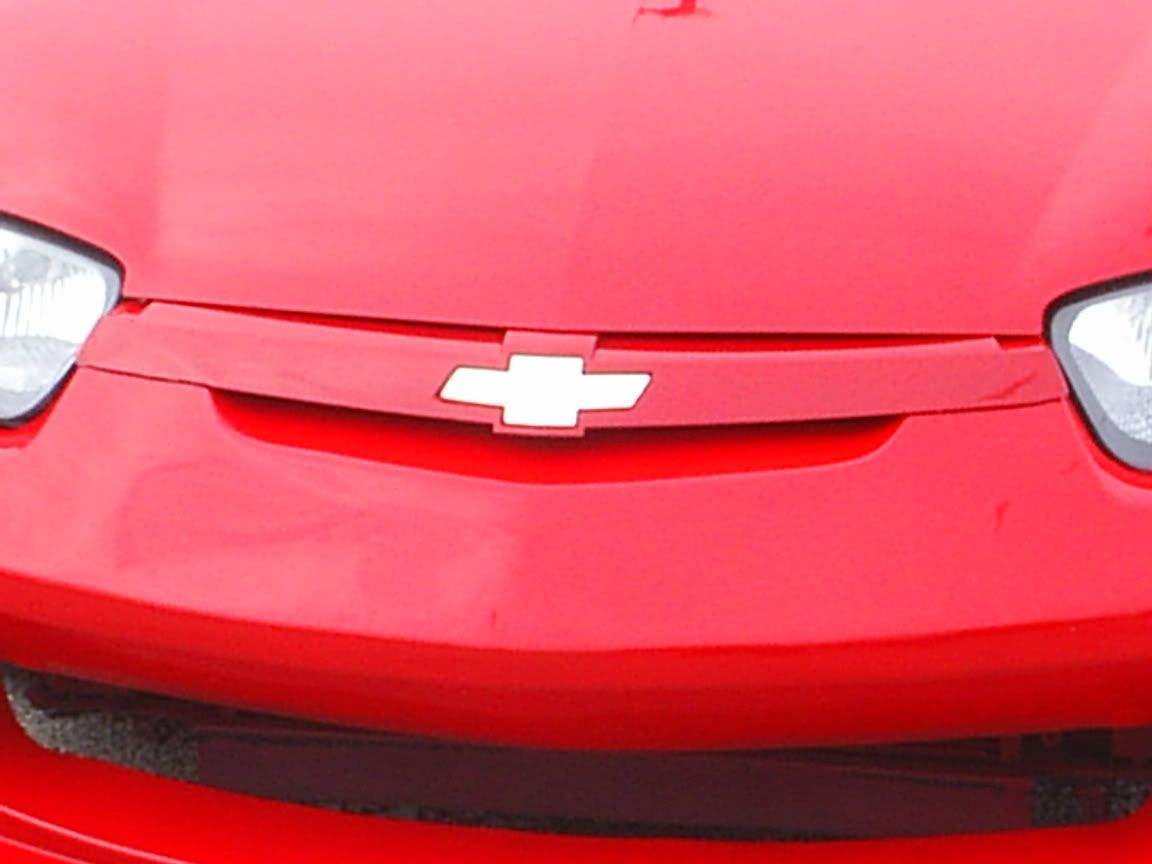
how do i remove this peice off my front bumper like this guy did?


Its just held on with adhesive if I'm right. Just try to get something under it and pry it up, but be careful.
unscrew/clip it from behind...it only a cover piece on the bumper, comes right off. To fully remove that bar between the headlights you'll also have to cut it off the bumer as well (it has a backing piece as part of the grill)
 My Car Domain
It pulls right off but there is another "bar" behind it, but becarefull when u remove those peices your hoodlatch assembly will be in plain sight and need to be painted at the least. imho i wouldn't do it.

and if you decide to remove that bar in back, and you add mesh like this,
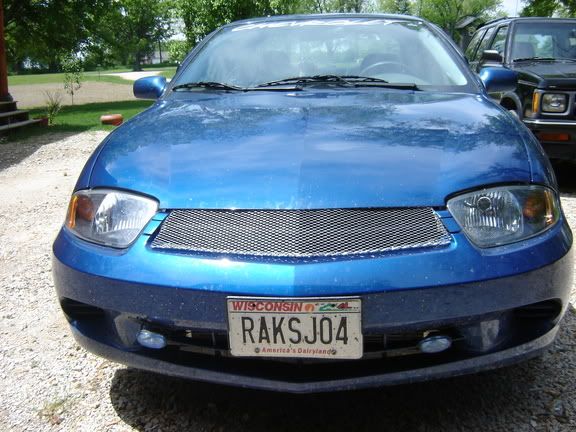
make sure you don't leave it sliver, half the org will mock you. trust me.they will. yeah, it just pulls off. the back bar is part of the bumper to get that off you have to hack it off. i used a sawza. the grill as of today.
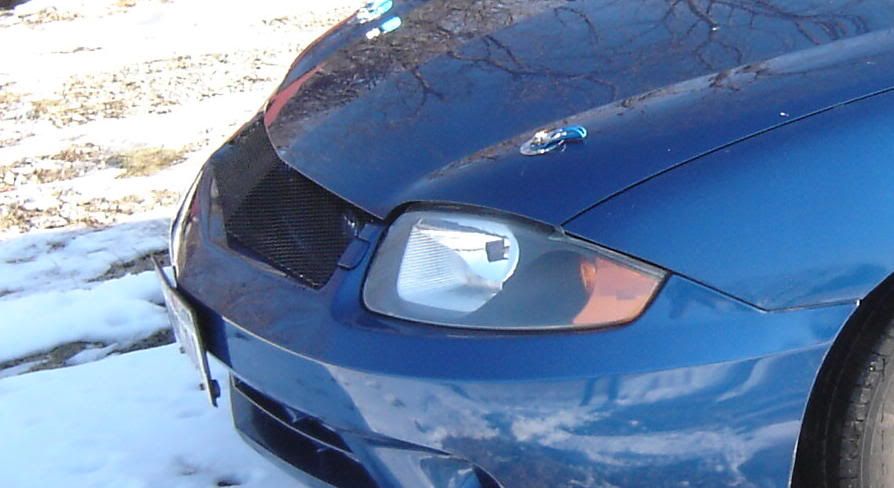
Dear god. Please don't do the mesh.
wow that is really ugly!!!

STREET RACING IS DUMB, I LOST MY BEST FRIEND TO IT
hey screw you, it is my car, and it looks much better in person

The center bend of the mesh doesn't match the line of the hood. You didnt' fill the spot next to the headlights where the piece you took out starts. The edges aren't straight by the passenger's side headlight. I hope it looks better in person. The other question is...how do you open your hood with that there? That's gotta be a pain in the ass.
^^^ it also looks like gutter mesh

__________________--------------------------____________________
Team: NONE RIGHT NOW
Sponsored By: Pro Trucks
Work Being Done By: creative customs
Stuff for Sell:
Well to try to get this thread back on track, if you just want to pull the bowtie piece off just start pulling its just held on by pressure clips. there is another bar underneith that, so if you are trying to have a huge opening there, you will have to cut it out and figure out how to fill the indents on the sides from the front bowtie bar. BTW that is my pic so I just had that piece off the car to pull the original hideous gold bowtie off and put on the new C/F one. Then I just pushed the bar back on and it looks great.

I recently picked up a Bomex kit for 04
and i hate that on the front theres that small gap
now at Battle of the Imports in Houston recently there was a cav there w/a bomex kit
and he has a good idea (one i had been thinkin of for a while) but he went in the
wrong direction..here's a pic
he basically removed that middle piece and slapped 2 sided tape and put on
the front of the kit..from far away..not so bad, up close..different story
sorry to thread jack but has anyone w/the Bomex try this?

we'll after scrolling far enough i seen the whole thing ^^^ that is a great idea.
also to the orignal post i would leave the top bar there, glad there was pics (its nasty looking imho, sorry RAKSJ04) if you really want to cut i would do the bottom part Maybe.

ok guys the thing look good when it was 1st installed, i had like 10 screws holding it in, i removed it like 5 times to paint it, power coat it, it is red line mesh, and opening it takes getting use to,and with the hood pins it is easier. and i know it is messed up it is aluminim bends easy. i would re do it but that mesh is hard to find, i want to know why when anybody does something a little different here on the org people give them crap. but hey throw on a set of clear corners and your awsome. i know it looks crapy. but i am more worried about my turbo or my suspension right now. i am going to throw a dift front bumper on there when i can get the money, and do my two tone paint and it does follow the line from the hood to the front bumper.

Ozzie(Now Quotable) wrote:I recently picked up a Bomex kit for 04
and i hate that on the front theres that small gap
now at Battle of the Imports in Houston recently there was a cav there w/a bomex kit
and he has a good idea (one i had been thinkin of for a while) but he went in the
wrong direction..here's a pic

he basically removed that middle piece and slapped 2 sided tape and put on
the front of the kit..from far away..not so bad, up close..different story
sorry to thread jack but has anyone w/the Bomex try this?
I was thinking about doing that but not anymore lol.
but i do have plans for this spring on that crapy gap
__________________--------------------------____________________
Team: NONE RIGHT NOW
Sponsored By: Pro Trucks
Work Being Done By: creative customs
Stuff for Sell:
lol
yea like i said...thats not the best way to go obviously
but i think that wil some modification i'll get it to work


to do it right you have to cut the sucker out...to get it to look good you have to use a bit more finess than a sawzall and mesh. but hey, i wont dis or drag the thread off topic.
what you will need to do, is get yourself some GOOD urethane epoxy. if it doesnt set up after the second try and stick to the bumper, throw it out and buy a differant brand. FYI napas brand of bumper repair epoxy will work, but it is super finicky and with only set up one out of six or more trys it seems,lol.
you will also need to brace the bottom where the stupid bar connects to the bumper in the three strips under the bar itself, cause repair urethane epoxy is soft and without bracing you will see the lines where you filled in the bottom part of the bumper. you can always do like an above poster and cut the whole thing out, but then you HAVE to add mesh, cause then the styrofoam bumper support will show, and will look ghetto as hell.
the braces to the right and left are easy, it has screws on both sides to add support for the bumpers, which is why the above poster didnt fill those in, besides, filling them in means you HAVE to repaint the bumper of course. if you do it, get some bulky machine screws and use hard epoxy to super glue the boxy machine screws in, the ones with hex heads work best of course so the opxy can grip the bolt. the threads of course should be pointing out towards the car, and should be taped so you dont get hard epoxy on the threads. then you have to bore out the metal supports the bumper bolts to to fit the machine screws through and bolt from the back side.
now, do all your spot filling, sand it smooth...the urethane epoxy is not only touchy, but it comes off like rubber with a sander, it doesnt finish smooth. you will have to use some soft body filler that doesnt harden, not the metal bodywork kind, it will harden over time will seperate away from the rest of your epoxy, it doesnt bond well.
get a good polypropelene primer or kylon fusion, or acid etch the exposed parts, sand down the rest of the bumper to primer, then coat the whole thing in primer and shoot paint on it.
i put lord knows how many hours into mine. looks good, but, uh....lets just say next time i damage the front bumper im going to buy a body kit.
P.S. yes it exposes the hood latch and cable, it has a plastice cover in front of it, but that wont do sheet. i made a diamond plate replacement piece for the black plastic one that normally covers the top of the radiator and the headlights,ect. you will have to remove the piece entirely or do some sawzall work to it, cause the sucker sticks out where the bar used to be and again, looks ghetto as hell. my plate makes a bend down to cover the hood latch, its in plain site, but i painted it black to blend in, the top part that can be seen is covered in red paint.
p.s.p.s. its a lot of muther f'ing work...IMO, not worth it to do it right...i am happy with the results though.
