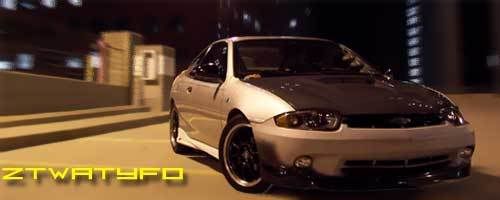
Here is the latest edition to my car... Dont mind the bluriness of the picture, the camera wasn't that good... And if it was dark, instead of lighten up in the underground parking the image would of shown up better...
Now Do you want to know How to Make them... Well here you go: Anyways hope you understand my writing
How to make a lighted licence plate frame :

Stuff you need :
Methylene Chloride… Available at most fibreglass/plastic supply shops
2 licence plate frames ( I suggest looking for the ones that I used, with the complete thick edge across the top, as it gives a place to hide the led bar, and the edge of the plexiglass.)
1 piece of 3/8” possibly 1/4" ???? plexiglass ( I think... Measure the width inbetween the 2 frames to be sure of plexiglass size.)
LEDS I used 5mm because thats all they had when I first started making these, but they make 3mm and I'd actually suggest using them because they take up less space, (valuable space especially when it comes to drilling your licence plate mounting holes through the plexiglass.)
PC Grid Board
Wire
Resistors
You take the 2 licence plate frames, cut off the licence plate holding tabs on the back (the things the licence plate frame has to slide inbetween to get the frame on. (only the little lip that goes on the back of the licence plate.)
Take the M.C. and use a syringe to glue the 2 frames together, back to back, so that the plexiglass would slide inbetween
Have the plexiglass cut to be able to fit snugly up inside the 2 frames, so it’s a “sandwich”
Now for the leds, cut the grid board so there is 3 rows of holes. Then you have to find a away to wire the leds and the resistors in… The resistors I’ve found if you go from the forward row, up to the 3rd row and over 1 or 2 holes, and have the led leads in the 2nd row, and I think 3rd row (it’s been about 4 yrs since I’ve actually built the circuitry.) and then solder the leads all together so that all the leds are running in parallel to each other with a resistor for each one. (this way if 1 led burns out the rest stay on instead of losing 3 leds when 1 burns out, or solder joint comes loose.)


You’ll probably have to use 2 strips of the circuit board, and then wire the 2 strips to red and black wires in the center.

Drill 2 holes that the wires will slide through in the upper edge of the licence plate frames.
Slide the led “bars” into the frame, with the wires running through the holes.
Slide the plexiglass into the frame. You’ll probably have to trim the plexiglass a little bit in order for the plexiglass to fit all the way inside, with the leds. flame polish the exposed edge of the plexiglass.Once everything is put inside, take the M.C. and use it along the edges that the plexiglass and licence plate frame touch, to create a water resistant seal. You could probably use other epoxies also, but M.C. is the one I’ve used.
If you don't want the light to make it to the ground, use a piece of black tape, or paint the bottom edge of the plexiglass, to trap the light inside.

Now you have a working frame. Drill the holes for the licence plate screws. Get some glass etched vinyl cut to the design you want, carve a design, or sandblast a design, it doesn’t matter. Now you have a led licence plate frame.
T I C K E T W A I T I N G T O H A P P E N
obstruction of license plate
This a CALIFORNIA CODE, but I am sure other states have one too
Obscuring Readability of License Plates: Prohibition
5201.1. (a) A person shall not sell a product or device that obscures, or is intended to obscure, the reading or recognition of a license plate, as prohibited by subdivision (g) of Section 5201.
(b) A conviction for a violation of subdivision (a) is punishable by a fine of two hundred fifty dollars ($250)
Added Sec. 2, Ch. 273, Stats. 2007. Effective January 1, 2008.
pretty cool effect, but TOTALLY illegal.

yeah... I know its illegal, but when it's off you can still read the licence plate, so the cops don't notice it... unless you're driving down the street with it on, but most "aftermarket Lighting effects" are illegal

good idea and nice write up

Moar Candy! LAWL wrote:good idea and nice write up
x2 I'd love to see how it would look with white LEDs and no logo.
Shadowfire wrote:Moar Candy! LAWL wrote:good idea and nice write up
x2 I'd love to see how it would look with white LEDs and no logo.
white leds for a license plate light looks tits. most newer cars come with this and imo it just looks very good.

Cool idea! Defiantly going to do something like this soon. It'd be nice if you had some clearer close up photos of the wiring...

Let's see if I can describe this properly...... the green is the resistor... the blue is the leds.. the black is where the resistor is soldered to the led..

so across the top 1 end on every resistor is soldered to the other resistors end... forming a chain... The resistor is put on an angle going 1 row down, 3 rows across. the led is installed in the hole in the center beside the resistor. this is where you twist the resistors unsoldered end to the led's end. the other wire for the led, goes down one hole. and this lead is used to string all the leds together, just like you did with the upper row for the resistors... pull it across, twist it around the straight up lead and solder, cut off the excess.... bend the straight up one across to the next led, wrap it around this ones straight up lead, solder it, and of course you have to make sure each led, is wired up properly... because they only allow current one way... so if one is backwards, that one won't work...
Hopefully this makes sense... I can't seem to get my camera to take a good close up picture... cheap camera... unsteady hand... and all..
Moar Candy! LAWL wrote:Shadowfire wrote:Moar Candy! LAWL wrote:good idea and nice write up
x2 I'd love to see how it would look with white LEDs and no logo.
white leds for a license plate light looks tits. most newer cars come with this and imo it just looks very good.
Exactly what I was thinking. I've seen newer cars with white LEDs and it looks soo much cleaner than the yellowish light output from normal bulbs. I may try this with my rear plate.
I had built a "white" one before... It looked pretty good. with and with out the carving... Wish i still had the pics around. or atleast a few frames kicking around that i could take pictures of... But I am not going to build one just to take pictures. Thats why I made the how to, so that others could build one themselves. I've found the best colors are the blues, reds, greens, ... the orange/yellow don't seem to be as bright, but it could be the leds i used. and the purples are really not that bright (well the ones that I used.) The white looks nice, uncarved, but looks streaky, because the leds i used didn't have enough of a viewing angle to them. you want ones with a wide angle so that hopefully all the streakiness is hidden inside the frame... if you look at one of the pics with out any carving you can see what I mean about the "streakiness". You can also see that 2 maybe 3 leds are burnt out/not wired properly /solder joint came loose.


