Has anyone put these on 03+ cavaliers. If you have could you post some pics of how it looks, and tell me the steps you did to put them in? I just got my order of these in the mail, and would like to put them in soon.
i have a set installed coming from the gp. waiting on them to be shipped back.
yup go to the GP and have some made from Benham!

xpsscorpion wrote:Has anyone put these on 03+ cavaliers. If you have could you post some pics of how it looks, and tell me the steps you did to put them in? I just got my order of these in the mail, and would like to put them in soon.
you mean the "no cut" projectors?
If so, look up member Chris Carr,
He bought them from me in the GP, an pmed me to let me know he got them installed.
Hopefully he will post up pics, i have some pics of them in an 03+ housing, but as many of you know, i am having utter technology failure and can not load nor view any pics at the moment.

lol I will take some pics today of them in the headlights, and tonight once it gets dark to show light output and such. Il try to get a couple of pics up of how i decided to mount everything. It says "no-cut" cut but i decided to do a little cutting just so things would fit the way i wanted to. Should have everything up tonight or tomorrow morning. And did you check into that wiring we talked about John?
Yeah, that I did. Still hoping to get some actual pics of your wiring.....just please remember my "problems" with technology I am expiriencing.
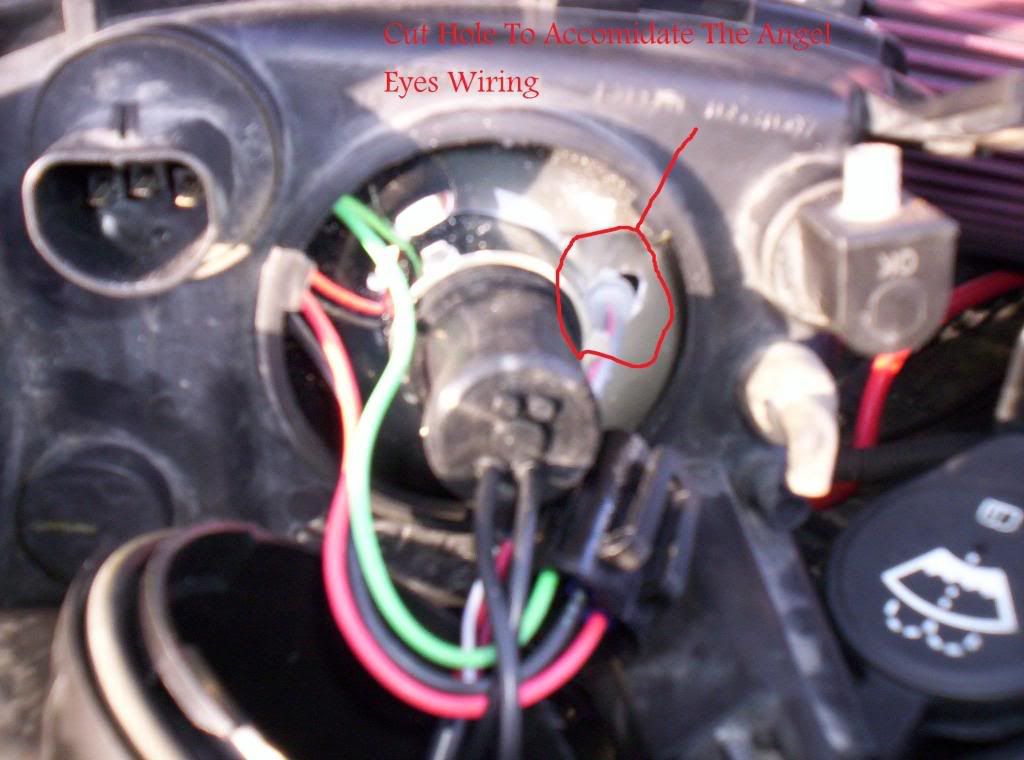
And yes, the "no cut" is almost true, although i have not had to cut any lights to get them to fit right, you do have to drill a hole for a wiring harness to go through.
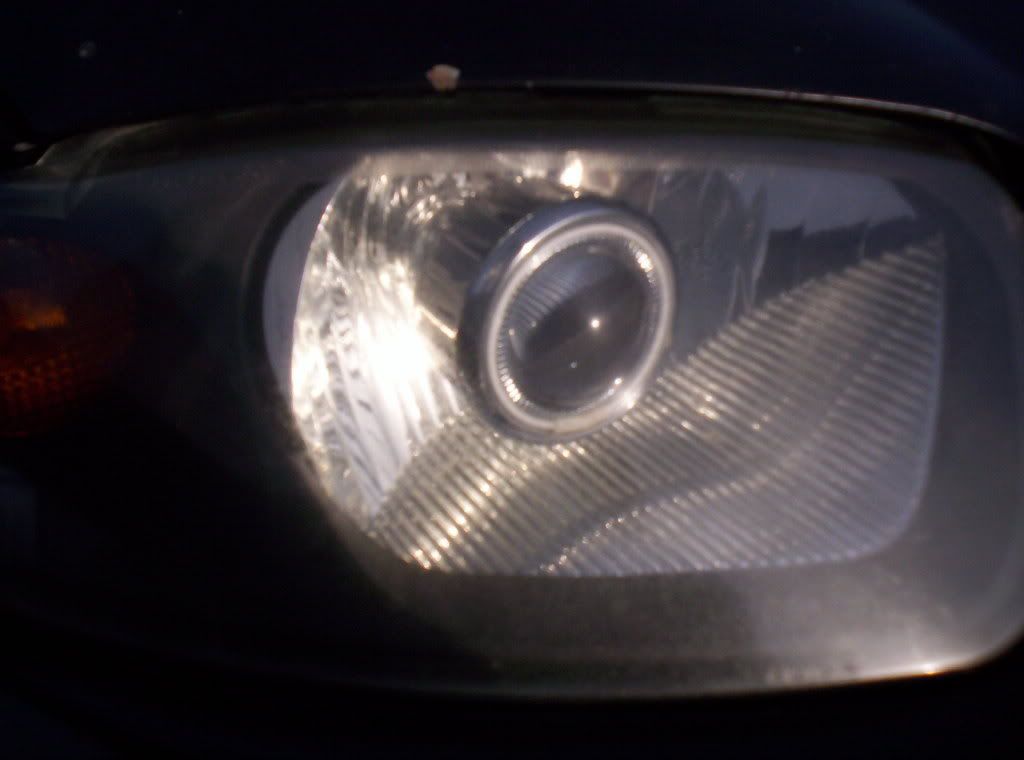
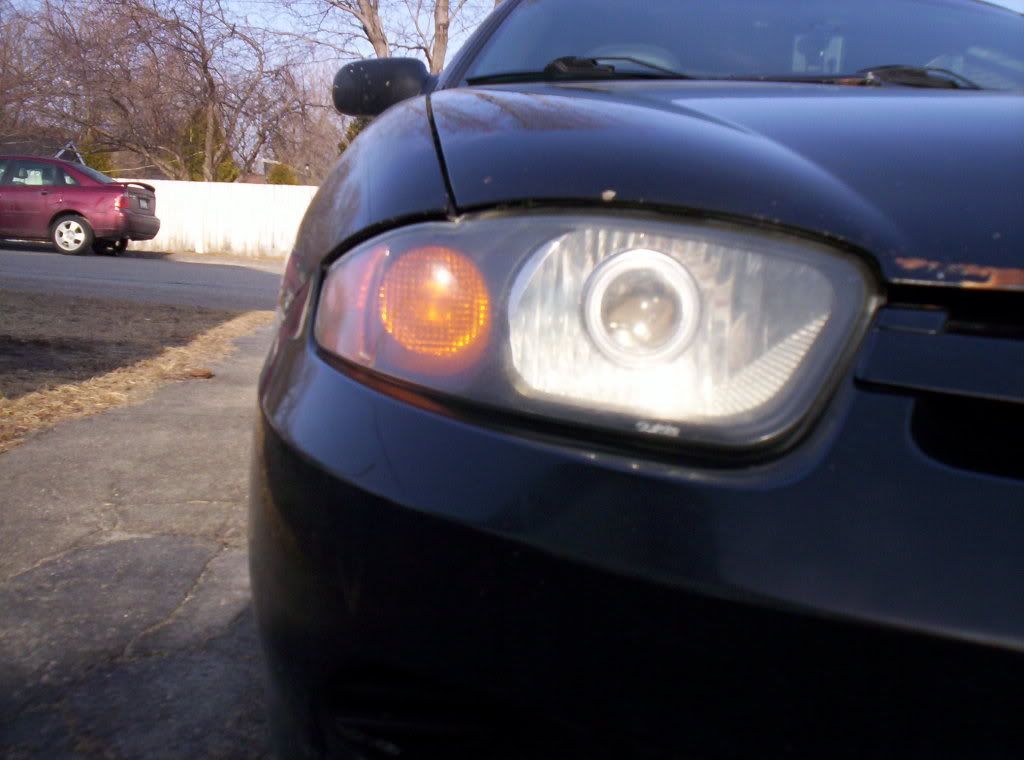
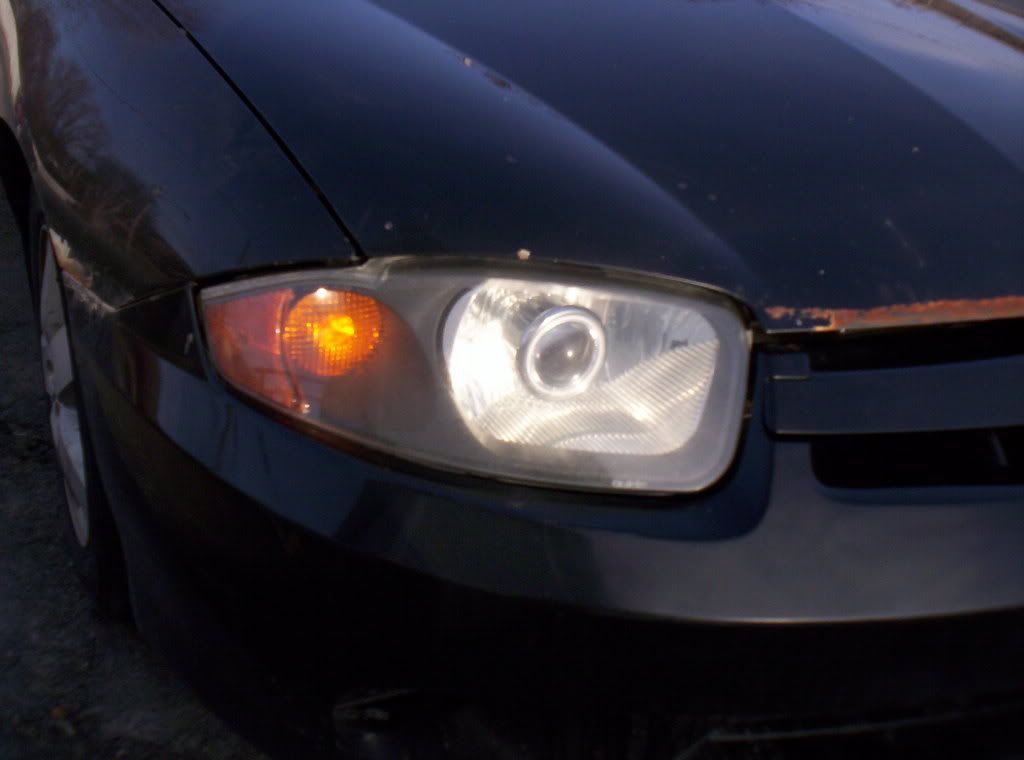
So..... I went outside to take some pics while there is some daylight left. Night shots to follow aswell.
Here are a couple of pics of the projectors in the headlights from different angles. Please excuse the rust lol, custom paint coming soon.
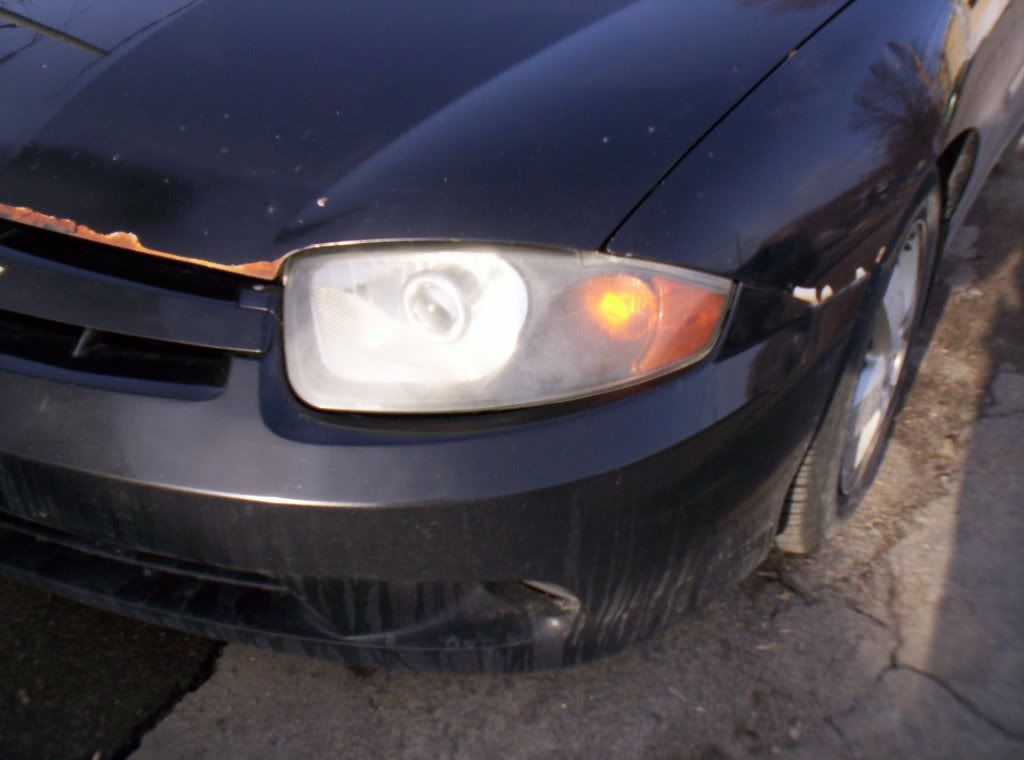
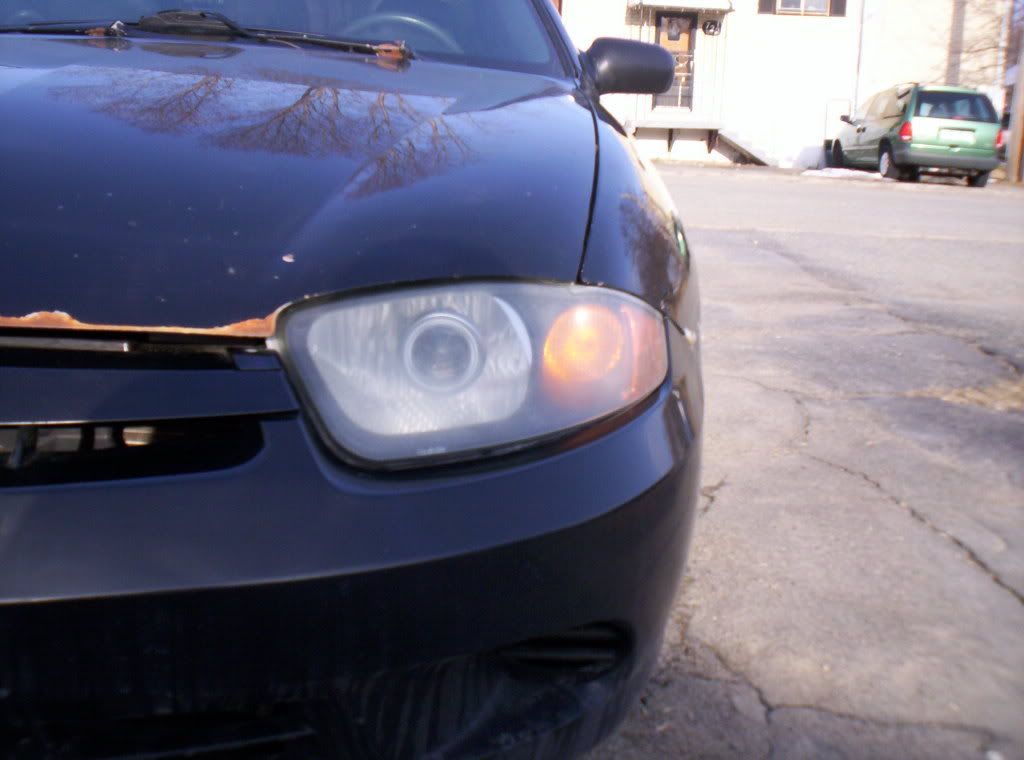
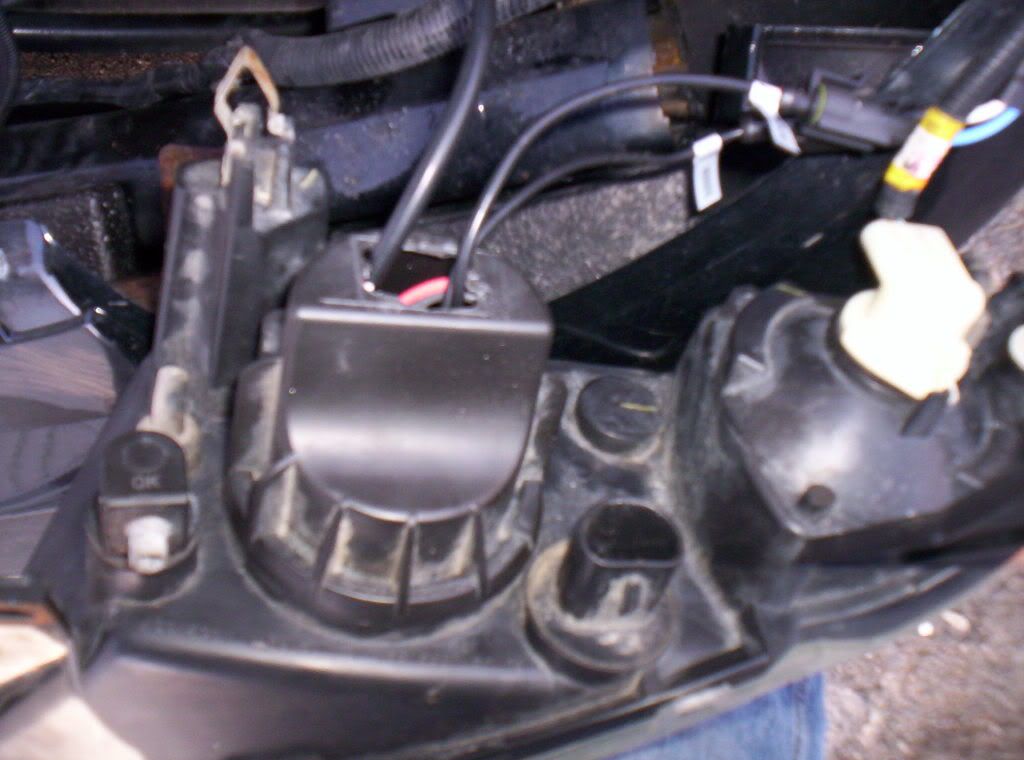
Here are a few pics of the backside and wiring
This one shows where i decided to mount one of the ballasts, and the plug adapter
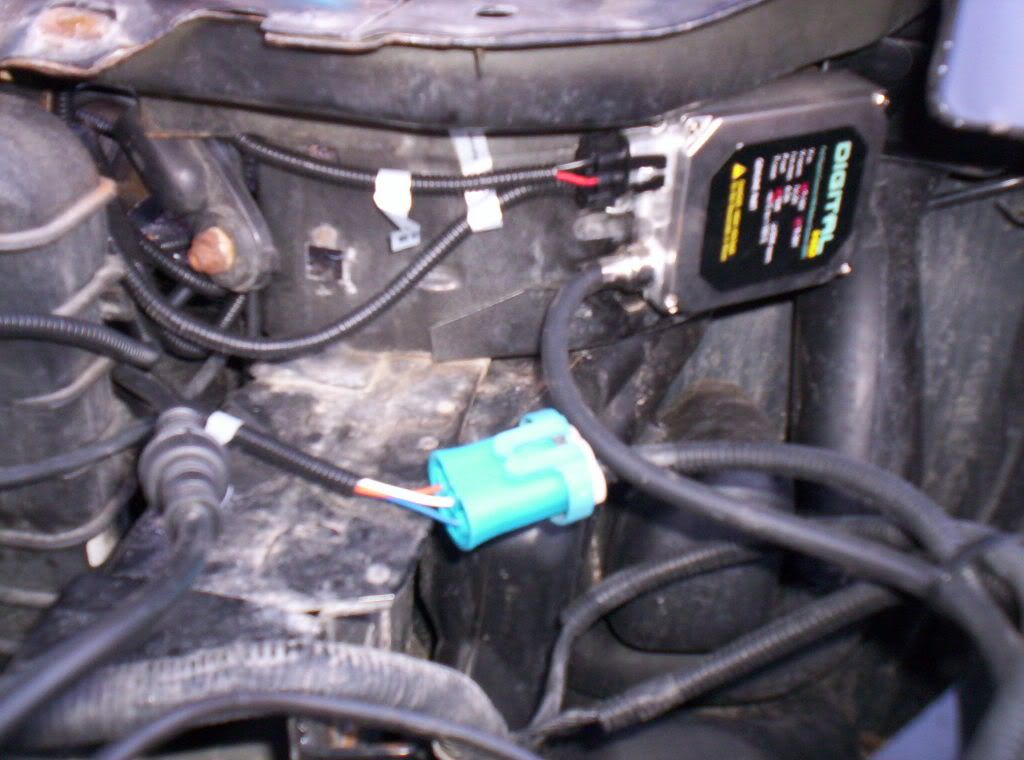
You dont use this plug anymore after the install but incase i ever put these back to stock I didnt want to cut it out, so i just tucked it into the dust cap.
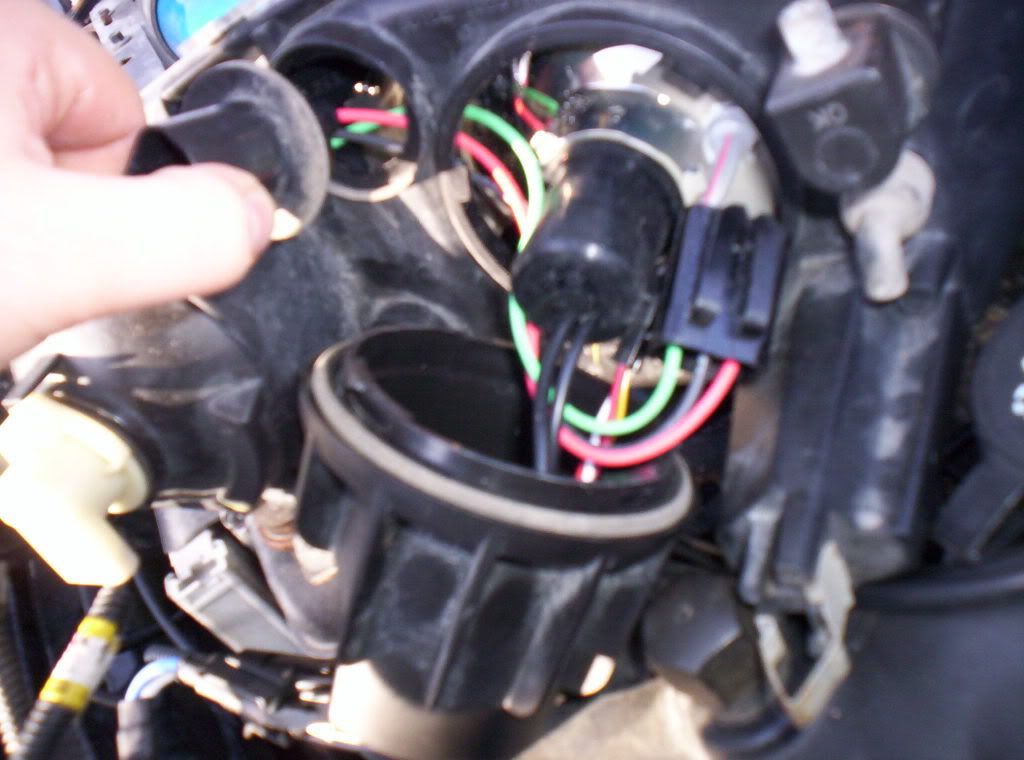
I cut a hole in the dust cap to allow the wiring to pass through i plan on making some sort of rubber seal for it but this will do for now.
And this is where i decided to cut a hole in the backing to pass the angel eye wiring through
John il pm you some more wiring pics and we can go from there.
Maybe someday I'll be able to afford these. I'm trying to come up with ways of getting more light output from my 04 cav. Of course, I'm sure being on stock / original bulbs isn't helping any.
Well its a really good deal from John right now. Was very much worth the price.
nice, just like my first set using the silver shroud as a projector bezel. looks good. try and use abs plastic sheets and a heat gun to make bezels, the end product is great. and i just got to throw it out to john, great job on finding these and making a GP. youre one of the few people willing to do the "hard work" like a few of us did, so that others can get up the balls to pull their headlights apart...its kinda sad though. having a projected & halo'd 03+ is run of the mill. just makes my DD more common i guess.
That install looks great. I'm impressed
Thanks, I try to keep my installs as clean as possible.
Dont have projectors yet but this is what i did with my dust cap for my hid install


Ron...
I like that, might look into it. thanks
Ronny Cain wrote:Dont have projectors yet but this is what i did with my dust cap for my hid install
thats a clean way to do go.
did that grommet come with the hid's?
i dont run my wires through the dust cap......but if i did.....thats how it would be.
Thanks . .. Ya they came with my kit (Pilot) was a bit of a pain but i like the way it turned out .
Ron...
il have to buy some of those
Chris man, put up some output pics of those things!
M62, 42's, ZZP 3", ZZP S3 H/E
214whp 190wtq
yeah id love to see the light projection pattern of these units
night pics going up tonight after work
cool, chris could you tell me the exact steps you did to get yours in there? oven temp/time and ect... thanks
i usually heat them @ 250-300 for about 10 minutes, and see how sticky the glue is. then either get them apart, or throw them back in for a few minutes.
I have some pics of them in sunfire headlights as well, but ill wait until they get back to luis before posting them, and mike, check your email. i sent you some peeksures.
Ya, I used 250 for 12 minutes, worked at that temp/time for both sides, then i ran a knife along the seam to loosen up the excess glue, put a screwdriver under the lens starting at the corner lights, and just worked my way around. Make sure you take off all the little rubber nubs and take out the bulbs etc before you bake them though. Then you have to pop out the metal shrouds in the stock bulb hole, drill the dust cap and the silver backing, pass all your wires through, tighten everything up and reassemble, I scrapped off most of the glue but if you cant get it all off it should still seal fine, just make sure to use use right amount of the sealant. enough to ensure good contact all around but not so it oozes out. If you have clamps you can clamp your headlights for an hour or so, or just hold them together for a few minutes.