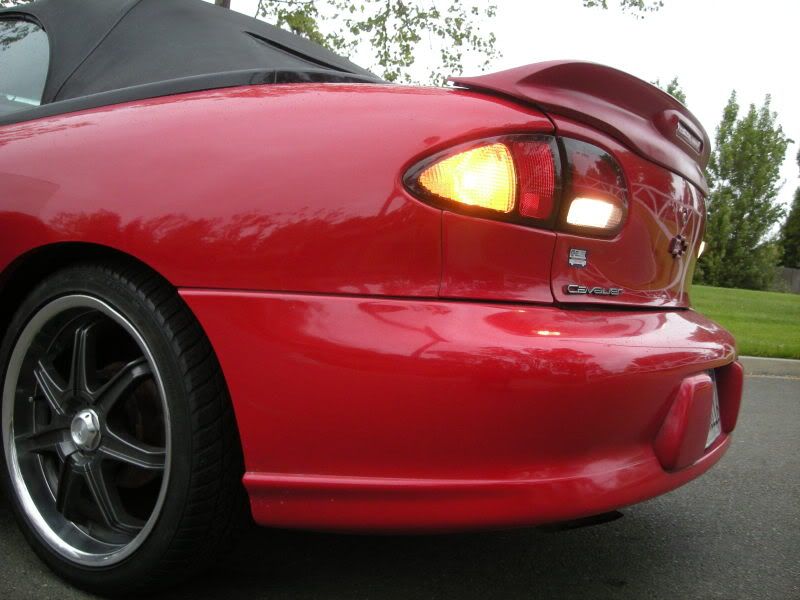
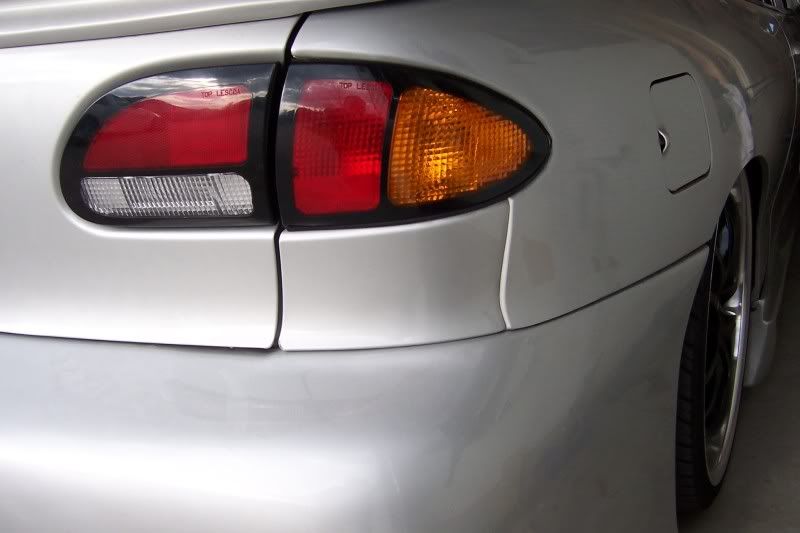
So after installing my Toyota Cavalier tail lights... and searching multiple times for wiring diagrams, pictures of installs, information etc etc etc...and coming up with some information... and missing information... I decided to do a write up and show how simple this conversion really is. (simplified version)
If this thread needs to be moved to another section, Give'r!
Tools and Parts for installation:
Toyota Cavalier tail lights
16g wire 4-5ft
Wire stripper/Crimper
Wiring cutter
Electrical tape
Heat shrink
Bullet Connectors
Male/Female Connectors
10mm Socket
Installation:
Step 1) Multifunction switch
1) Use 10mm socket to remove steering column housing
2) Remove Multifunction switch
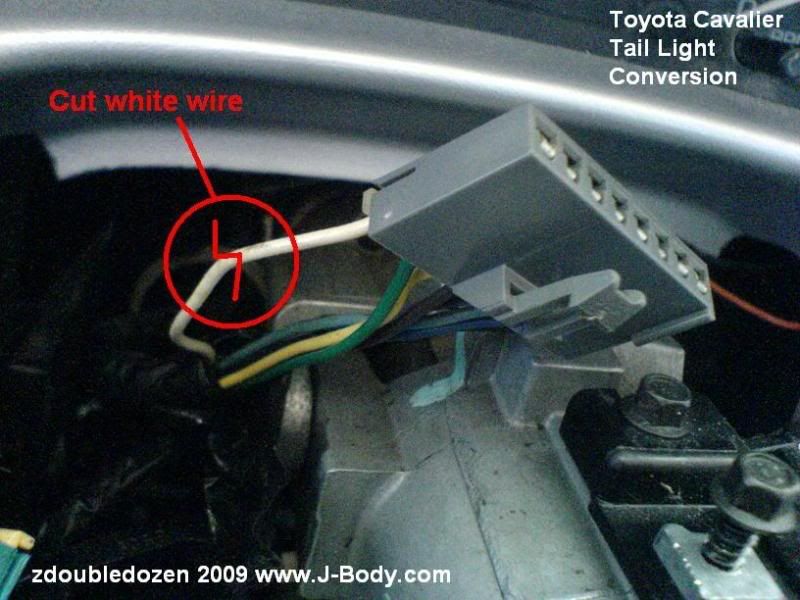
3) Locate grey plug and cut white wire
4) Tape wire ends so they do not come in contact with the steering wheel column to prevent a short.
Step 2) Passenger side
1) Connect wiring as shown in the picture below
2) Use male/female connection to allow you to easily switch back to stock with out needing to cut the wire again.
3) Use heat shrink or bullet connector and extend the white wire from the harness to the driver side tail light.
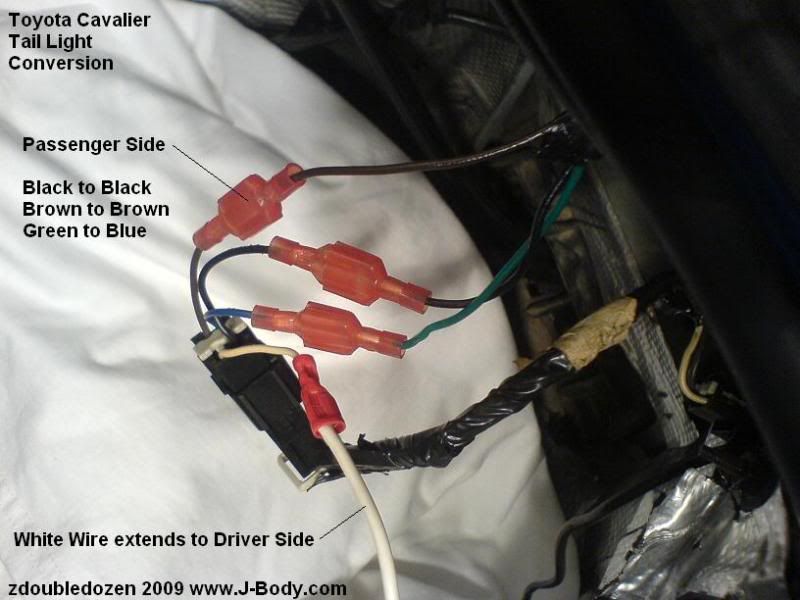
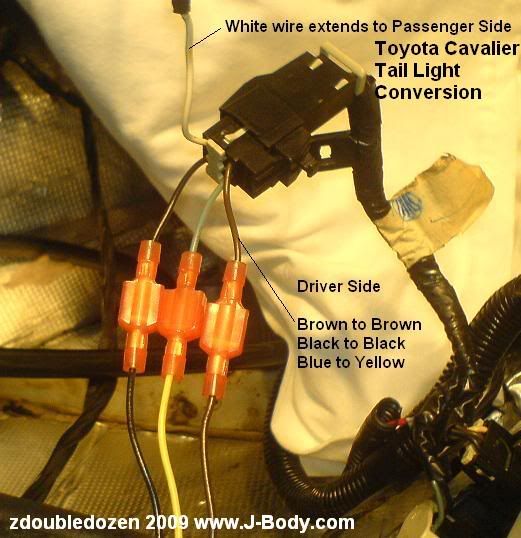
Step 3) Driver side
1) Connect wiring as shown in the picture below
2) Use male/female connection to allow you to easily switch back to stock with out needing to cut the wire again.
3) Connect white wiring from the passenger side to the white wiring on the harness.
4) Also connect another 2ft extension wire to the white wire from the harness to allow you to connect to the 3rd brake light if equiped.
Step 4) 3rd Brake Light
1) Connect wiring as shown in the picture below
2) Use a bullet connector or heat shrink to connect the wires.
3) you may want to extend the stock white wire to allow a better clean up and install.

Step 5) Wiring Clean up
1) Clean up your wiring with wire loom as shown in the picture below.
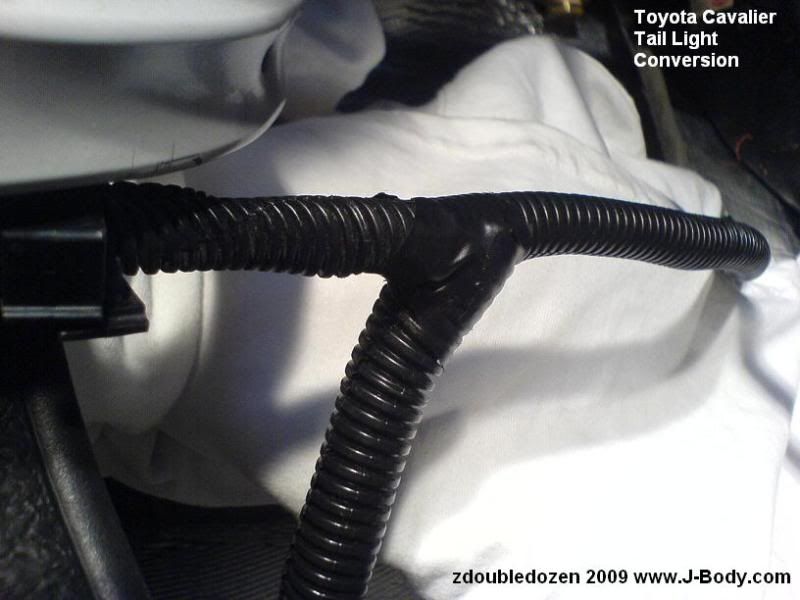
Reference sites or threads.
http://members.shaw.ca/toyota_cavalier/page5/page5.html
http://www.j-body.org/forums/read.php?f=7&i=328347&t=278772&p=1
http://www.j-body.com/community/showthread.php?t=27130
Enjoy.

i 2nd that!!! great write up z

Wow that's it? Guess I should have mine done finaly after almost two years of having my tails. Sticky! For the win.

Thanks....
if a mod ends up making this a sticky... please change the socket size to 7mm on the tools and step 1...... my bad. lol

AZ24Ncav wrote:got mine done!!
I don't believe it....
Very nice write up Matt!

M62, 42's, ZZP 3", ZZP S3 H/E
214whp 190wtq
Let's see the pics!
it will at least give this thread a picture of what Toyota Tails look like for the newbs that have no idea what this is about ha!

ok but they are from my curve... ill go take some with my digi can later. i should have taken pics of the wiring harness though..


Good job!
PRND321 Till I DIE
Old Motor: 160whp & 152ft/lbs, 1/4 Mile 15.4 @88.2
M45 + LD9 + 4T40-E, GO GO GO
sticky this ish great write up

ya why isnt this a sticky yet, shows what the jbo has become

Bump for a friend who's been looking for this thread.

Just used it this morning to verify I had it all right in my head before i wired up my buddies


def sticky this! and put it in the FAQ also

tabs wrote:def sticky this! and put it in the FAQ also
x2

M62, 42's, ZZP 3", ZZP S3 H/E
214whp 190wtq
I have no idea who's an admin that would do it... sorry guys!
If you know of one, send them a PM or something lol.

sticky! + saved to my favorites

Sticky pl0x!
Used this to install mine, was so vry vry ez!


Faith is to believe what you do not see; the reward of this faith is to see what you believe.
-Saint Augustine


